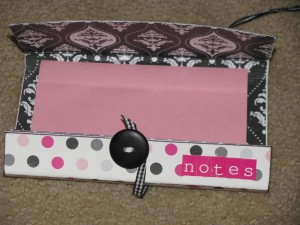
In going through my desk drawers I found at least 10 sticky note pads of various shapes and sizes {all buried at the bottom of course where I couldn’t actually use them!} So I decided to create something a little cuter that I might actually use and display. Using various materials that I just had around the house, here is what I came up with:
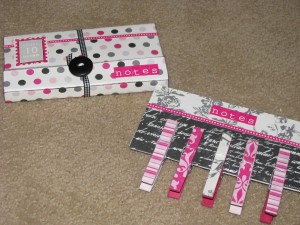
Set Number One {notepad and clothes peg magnets}
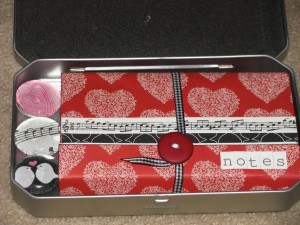
Set Number Two {notepad and glass marble magnets}
Fun, right?
I’ll try to give you a little tutorial on how to make your own. Hopefully, you can follow along as it is one of those projects that is much more difficult to explain than it is to actually do! If it doesn’t make sense, just let me know!
MATERIALS
For the notepad:
- sticky note pad {post-it notes}
- Thinner cardboard {I order my pictures online and I always save the cardboard that is included in the packaging to make sure the photos don’t bend. You could also use old cereal boxes or something like that.}
- Something to score your cardboard and paper.
- Glue
- button and embroidery thread
- ribbon
- scrapbook paper and embellishments {The first set is made from the Echo Park Be Mine line and the second set is from Bo Bunny.}
- small letter stickers {from Echo Park – I love these and use them ALL the time!}
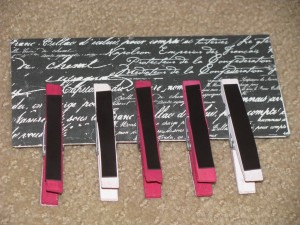
- clothes pegs {yes, I am sure you figured that one out!}
- paint {if desired}
- scrapbook paper
- modge podge
- magnetic strips {available at office supply stores or Michaels}
- glass marbles {available at Michaels}
- scrapbook paper
- magnets {I used the .5 inch diameter ones. Also available at Michaels or office supply stores.}
- clear drying glue {As always, I use my Quick Grip.}
- Measure your notepad. You will need length, width, and depth measurements. Mine was about 7.5 cm x 12.5 cm x 1 cm in depth.
- Cut out your cardboard. To get the length you will need, multiply the length of your notepad x 3 {this is a rough estimate so you may want to leave slightly longer and can trim as needed later}. To get the width you will need, add on roughly 2 cm to the width of your notepad.
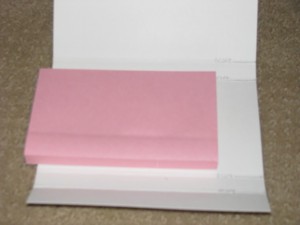
- Now you will need to score the cardboard {This is the part that is tricky to explain!}. Place your notepad on the cardboard so you can get a better idea of where to score. For mine, I placed my notepad approximately 4 cm up from the bottom of the cardboard. At the bottom end of the cardboard you will need to mark off two score spots. The first one is just below the bottom of your notepad. To get the second score mark measurement, it should be slightly larger than the measurement for the depth of your notepad. My note pad was 1 cm in depth so my second score mark was about 1.5cm below my first. You will then repeat these score marks above the notepad. So in the end you should have 4 places on the cardboard that you have scored.
- Cut out two pieces of scrapbook paper to cover your cardboard – one for the front and one for the back. Glue on one piece and re-score. **TIP: Make sure you use lots of glue over the whole piece of paper so it doesn’t end up bubbling. A brayer works great to really get the paper to adhere. Let the glue dry for a few minutes before scoring. Repeat with the second piece of paper. **TIP: If you are using directional paper remember that the paper on the back will need to be glued on in the opposite direction as the front piece so that it will be going the right direction when everything is folded up!
- Glue down your notepad.
- Sew on a button with embroidery thread to the bottom flap of the cardboard {This is literally the extent of my sewing skills!}
- Wrap thin ribbon around the button a few times to secure in place. Wrap around the back of the cover and down over the front until you are back to the button. Wrap around a couple of times to secure.
- Embellish your cover as you would like.
- Using some scrapbook paper, trace around the bottom of your glass marble and trim the paper to fit.
- Use a light layer of clear drying liquid glue over the paper and attach to the glass marble.
- Press and smooth the paper down to get rid of any bubbles.
- Glue on the magnet to the back of the marble.
I’ve linked up with these great blogs: Sassy Sites, Passionately Artistic, The Girl Creative, Under the Table and Dreaming, Whipperberry, Be Different Act Normal, A Little Lovely, Tatertots and Jello, Young and Crafty, Funky Junk Interiors, The Shabby Chic Cottage, House of Hepworths, Paisley Passions, Katie’s Nesting Spot, Night Owl Crafting, Polly Want a Crafter,Tip Junkie, Today’s Creative Blog, Sew Chatty, Sumo’s Sweet Stuff, Skip to my Lou, Support Blog for Moms of Boys, Craft-O-Maniac, Me Making Do, Paper Issues, Childmade, I Heart Naptime and CRAFT.


Great idea! I am always looking for a scrap piece of paper to jot a quick note. Keeping the magnets with the paper is genius!
this is {too} cute!!!! i so need to make this!
Thank you 🙂
Donnelle
http://sewmemine.blogspot.com
Love the notepad! I’m a new follower!
I made the marble magnets as Christmas gifties! YAY! so fun!!
I love that the clothespin magnets go all the way down the back. I had a set given to me recently that just had small dot magnets and they’ve already fallen off.
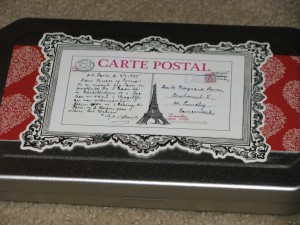
Where did you get the tin for the other gift set?
Stacey
http://boyohboyohboycrafts.blogspot.com
These are lovely, thanks for the tutorial!
spotted you at paper issues….super cute project
found you at craft-o-maniac – love love love this idea – made the notebook covers but never a combo – thanks for sharing
tina
mommyscrapsalot #277
Stacey, the tin is just left over from a lip gloss set I got. I’ve been holding on to the tin and was going to put a mini-scrapbook in it but the notepad and magnets fit so perfectly!
Very cute! Nicely put together! Great job!!
This is beautiful and would make a wonderful gift as well.
Hello Jenn. I hopped on over from Paisley Passion’s link. Your stationery/magnet/ clothespeg sets are adorablistic! Thanks for the inspiration. I’ve created similar items with different themes, and they each come out looking unique. I am your new 316th follower.
Those turned out great! Wouldn’t those make nice teacher gifts? Thanks for linking!
These all turned out so cute!!! Thanks for Linking up to Your so Very Creative @ Me Making Do I featured this at Featuring You Friday come check it out and grab a button if you’d like!http://memakingdo.blogspot.com/2011/01/featuring-you-friday_28.html
Oh my goodness that little polka dot notepad is adorable!
Thanks for sharing in FFA!
Hannah @ http://youngancrafty.blogspot.com/
Too cute for words! This is my first visit here (coming from Be Different…Act Normal) and I am heading over to see your clothpin wreath next.
Very cool! Thanks for linking up to Mad Skills Monday!
So in love! Thanks for partying with WhipperBerry this weekend.
kisses
heather
So Cute! Would love for you to add to my Thursday Treasure Party:
http://thetreasurista.blogspot.com/p/treasuristas-thursday-treasures-come.html
You have some AMAZING ideas here – looking forward to seeing more!
Lowri
http://papervinenz.blogspot.com/