Okay, I know it is the 19th of September already. And my intention was to post my calendar at the beginning of each month. But here it is…better late than never!
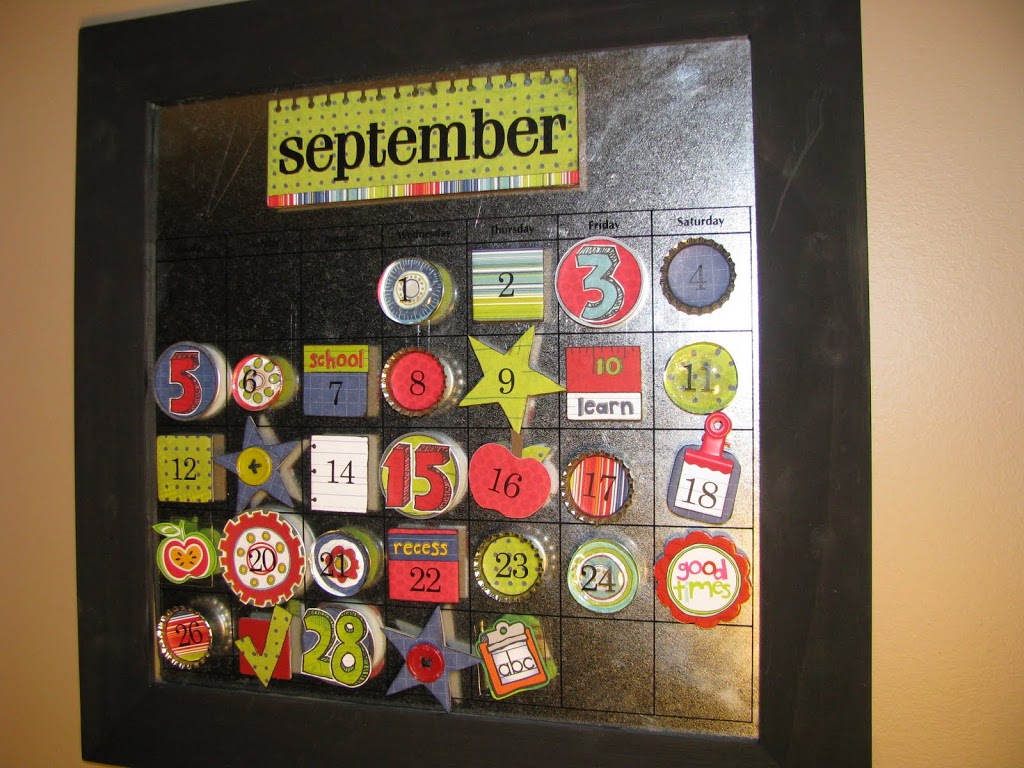
For the magnetic board, these galvanzied metal sheets can be bought from Home Depot (make sure they are the magnetic ones!). Treasury of Memories in Bellingham carries the plain sheets and also has one with a calendar on it if you don’t have access to a vinyl cutter. The store is no longer open but they still have an online site. The paper for the magnets this month is all from the Appleton Collection from Scenic Route. I also used some chipboard stars and a Making Memories clip (for the clipboard). Here’s the list of the basic magnet supplies (all purchased from Michaels if not specified):
- bottle caps ( I had these in my scrapbook supplies from years ago)
- chipboard cut into squares and one longer rectangle for the month
- glass marbles (make sure they are the ones that are flat on the back!)
- circle tags (you can get these at any office supply stores – they generally come with a string attached at the top)
- glue (I always use Quick Grip). I use this glue to adhere my paper to the back of the glass stones too but you could also use Mod Podge. Silicon Glue or Jewel It (a jewlery glue also works)
- magnets (really??). I used the 1/2 inch diameter ones.
- vinyl numbers and letters (cut from the Silhouette) or stickers
- black ink (I always like to ink my edges!)
- note book paper punch (used at the top of the September title). I got mine from Stampin’ Up.
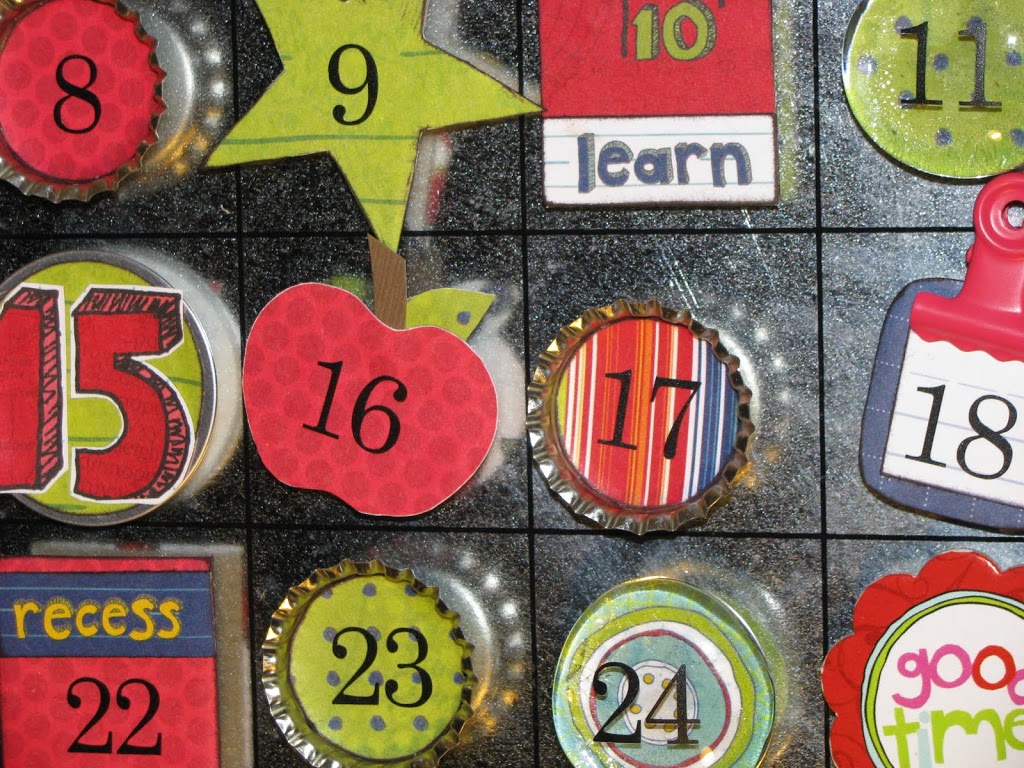
Now the fun part. Just cover the chipboard, bottle caps or circle tags with the paper of your choice (ink if you would like) and add any embelishments. I always like cutting out designs from the paper I am already using to keep it simple and coordinated. I also made the apple, checkmark, and clipboard to add some more interest. For the glass marbles, cut out a round circle from your paper (a 1 inch circle punch can come in handy but I just traced the circle from the top of a glue stick), spread a thin layer of glue on the paper(you can use a toothpick, and place the marble over top. Now add your numbers (I didn’t end up putting numbers on all of them) and magnets to the back and you’re done!
Hope that helps. I would love to see what you create. I am already working on my Halloween calander for next month and promise I will get it posted at the beginning of the month!
I linked up with I Heart Naptime,Under the Table and Dreaming, Paisley Passions, Blue Cricket Design, and Making the World Cuter. Check them out!


Very cute! Love the variety of prints and shapes. Well done! Thanks for sharing … I’ve posted a link.
Super cute! I love the calendar! Thanks for the inspiration and comment!
cute!
Such a great idea for calendar !
Such a great idea. I love this. I just became a follower. I have a crafting blog also. Here it is if you want to visit.
http://paintonthecanvas.blogspot.com/
katie
SOOOOOOO cute!!! Seriously adorable! Thanks for sharing your “creative mojo” with me on Thrilling Thursday. I hope you will be back again soon 🙂
~Lori S.
Thrilling Thursdays @Paisley Passions
This is just fabulous! Great job!
Thanks so much for linking up to Scraptastic Saturday!
Hannah @ http://youngancrafty.blogspot.com/
Fun! Love all the different shapes you used. Thanks for linking up to Scrappy Saturdays! Featuring this today too!
I linked to you!! 🙂
http://thespeckleddog.blogspot.com/2011/01/finally-finished.html
How did you go about attaching the wood to the metal sheet and how large is it?
Thank you, love them all!
So I did a little research and found you already answered my question in another post 🙂