I can’t believe it is Monday!!! This weekend just flew by and there is another crazy week ahead! We are now officially into our last week of school though so I just need to make it to Friday. Summer vacation, here we come!
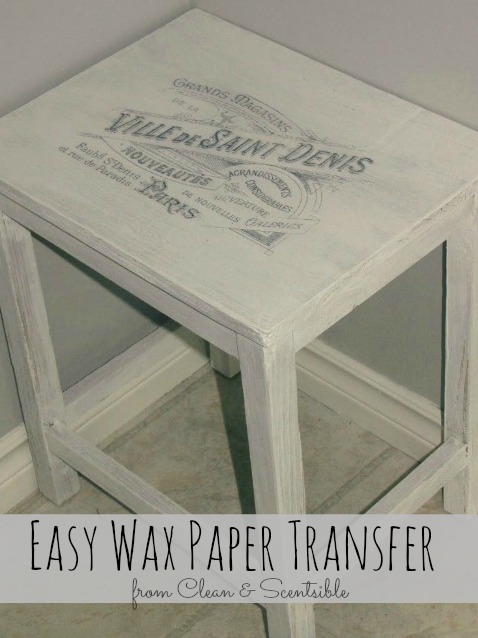
I just have a quick post for you today – one of those happy little crafting discoveries! Here’s how you can transfer any printable image to wood {or any other hard surface} using wax paper and your regular ink jet printer.
I just have a quick post for you today – one of those happy little crafting discoveries! Here’s how you can transfer any printable image to wood {or any other hard surface} using wax paper and your regular ink jet printer.
Well, even though I don’t have a ton left to do on it, progress has kind of been at a stand still. For some reason, those last little projects are always so hard to finish up!
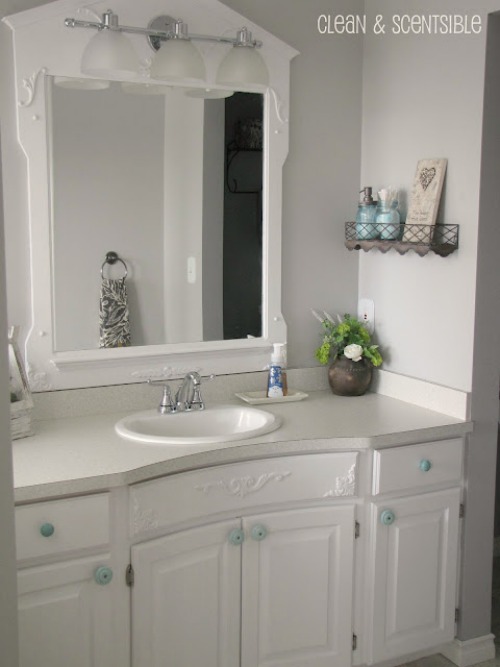
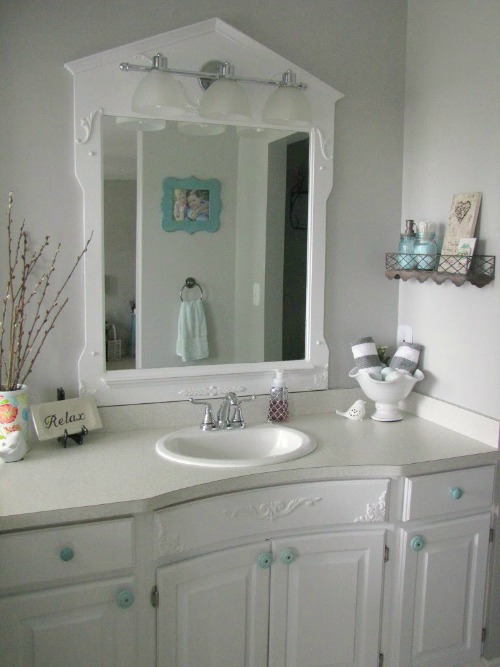
See that corner in the mirror by the towel? It was kind of empty looking so I decided to put a stool there. I found a couple of small ones at Home Sense that I liked so I snatched them up. One of them is in the corner of the master bedroom…
See that corner in the mirror by the towel? It was kind of empty looking so I decided to put a stool there. I found a couple of small ones at Home Sense that I liked so I snatched them up. One of them is in the corner of the master bedroom…
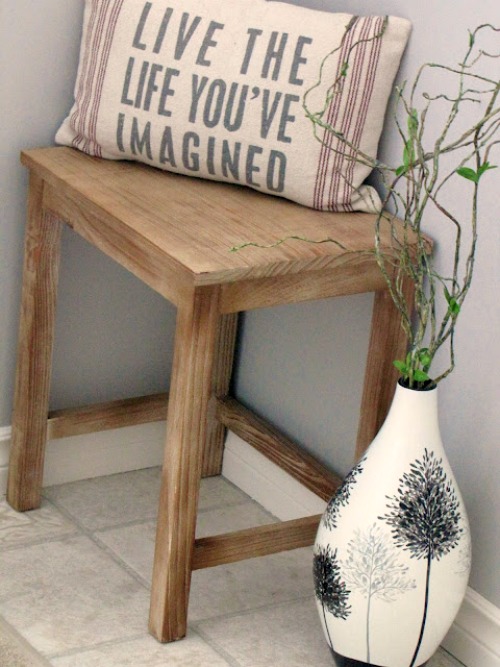
The other one that I bought was much more beat up and had some big white chips in it {I am assuming it is not solid wood!} I did one quick coat of Annie Sloan Chalk Paint in Pure White but it was still looking a little plain. I really wanted to add a graphic to it but I am terrible at painting and do not even have a steady enough hand for tracing. Then I came across this wax paper tutorial and thought that I would give it a whirl!

This is seriously one of the easiest projects that you could ever do {and trust me, if you could run into problems it would have happened to me!}
-
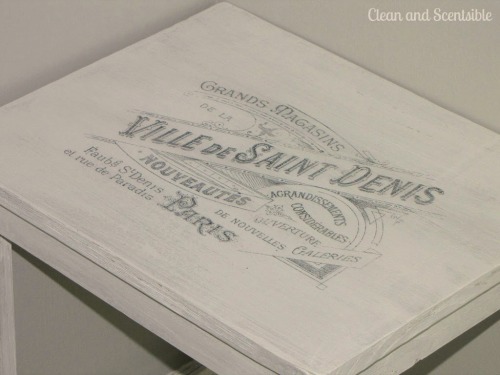
Pick a graphic. I chose mine from Graphic Fairy. Make sure you use a reverse image. Many of the images over at Graphic Fairy come in reverse but you can always just flip your image in a photo editing program as well. Now don’t ask me what the graphic actually says but Saint Denis was my favorite street to stroll down when I lived in Montreal so I decided on that one!
-
To help the image transfer better, you want the wood slightly wet. I used a spray bottle, directed the spray up into the air and just let the mist fall on to the stool.
-
Cut some wax paper to 8 1/2 x 11. Print out the image onto the wax paper. I just loaded the wax paper directly into the printer and it worked out fine. Depending on your printer, you may have to lay it over a piece of regular paper to feed it through. Gently guide the paper out as the image prints.
-
Place the wax paper over the stool and use a credit card or other flat edge to burnish the image on. You do not need to press too hard. Make sure the paper does not move! I found that with the wood slightly wet, the paper actually stuck quite nicely. Carefully remove the wax paper and you are done!!
I’m sorry that I was not able to get any pictures of the process but it literally takes 30 seconds to do and I did not want to risk moving the paper. I have a metal tin that I want to try this technique with as well. Not sure if it will work but I will let you know!
If you look in the mirror, you can also see that I added a new picture of my favorite two little guys.
If you look in the mirror, you can also see that I added a new picture of my favorite two little guys.
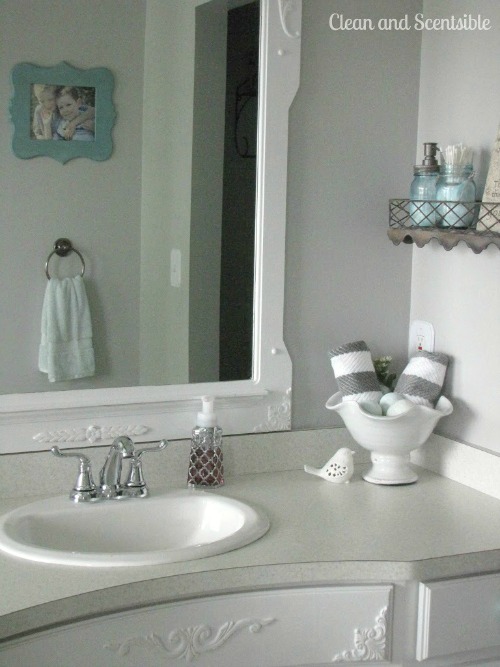
And did a little redecorating of the counter top.
I still have a few more boring {and tedious} projects to go but I am happy now with my little corner stool.
So if you have 5 minutes today, find some wood and wax paper and give it a spin!
Before I head off, I also wanted to mention that I have been having email problems for the past week and a bit. New messages have been turning up randomly in my old messages {which I had deleted}. Since I am unable to sort through 4000 emails to find the new ones, if you had sent me a question and I have not replied, please shoot me off another email. I love your emails – I really do!!!
Have a fabulous week!
it’s all gorg! i luv your mirror and vanity! did u add the embellishments? and i would have never thot the wax paper transfer would have been that wasy – thank you for this tut. all the ones i’ve seen on pinterest were a little over my head.
What a lovely update. You make the transfer look incredibly simple, thanks.
Awesome… sounds super easy!!!
Ok, I am definitely doing this, I pinned it. I want to do a stencil or something on my table and this looks pretty easy. Thanks! I would love for you to share this at my link party
http://thewinthropchronicles.blogspot.com/2012/06/share-it-link-party-17.html
Love this idea. I will have to try it. Your bathroom is beautiful! : )
This is awesome Jenn! laura@imnotatrophywife.com
what a fantastic tip. i’m dying to try it out to see if it’ll work on paper instead of wood.
This little table is fantastic! I definitely want to try this soon. I’d love for you to share this {and anything else you’d like} at my link party. http://adventuresofadiymom.blogspot.com/2012/06/terrific-tuesdays-21.html
Rachel
Alright- you talked me into it- just gotta find some Wood– and I am So doing this! Your stool looks super cute now- perfect touch Jenn! And your Master Bath– well hello- Beautiful!
Wow! Totally in love with the wax paper transfer technique. I’m sooo going to do that! LOVE how everything you did turned out! Found you via a link party and am now a new follower!
Jen, this is SWEET! I’m with you, I can’t draw and even thought I paint furniture for a living, I’m too shaky to write out anything with paint… Do you have an ink jet printer and is the ink still wet when you do it, like does it dry at all on the freezer paper? Let me know, thanx ~ Shelly Andrade Shizzle Design
Your stool turned out great! I am always looking for new ways to transfer images, so I will have to keep this in mind!
I will be trying this – sounds easy to do! I have a little bench/table similar to yours and this has given me inspiration – thx!
What a beautiful master bath – and I just love that stool ( along with your vanity )
I live in Montreal!!!
Your newest follower – would love to have you follow back
Hugs,
Suzan
Very nice. I have always wanted to try this process..thank you for the link to the tutorial.
Beautiful! I really need to give the wax paper transfer a try– it seems so easy! Maybe once we’re done moving I’ll get a chance to play/craft again. 🙂
How did you know I would be looking for something exactly like this? I already have a project in mind and was wondering how I was going to do this. Thanks!
Your bathroom is so chic and elegant looking, Jenn! And thanks for the tut on this transfer method. I’m anxious to try it out! 🙂
xoxo laurie
I love your stool transformation and the graphic you chose! Thanks for the tip~ visiting from StoneGable!
Such a great makeover! I want to do that to my kitchen stools. Now I know how! Thanks for showing me how and for linking up to TUTORIALS TIPS AND TIDBITS!
Love your stool transformation. Thanks for sharing your tips.
Blessings,
Sandi
What a fabulous room and that stool is fabulous.Seen you on the shabby nest, thanks for sharing this.
Maria Crafty Chic
This is really cute and a great tutorial. I have a Blog Hop, and I would love it if you would link this post. You can find it at
http://www.adornedfromabove.com/2012/07/3-face-masks-from-your-kitchen-and.html
It is called Wednesdays Adorned From Above Blog Hop.
I hope to see you there. Have a great Day.
Debi Bolocofsky
Adorned From Above
http://www.adornedfromabove.com
Sooo cute, Jenn! Love all your little touches that pull the spaces together 🙂 Such pretty decor you have! 🙂
It might be a quick and easy project Jenn but what a great result – well done. Thanks for sharing at Shabbilcious Friday 🙂
That sounds like a neat technique. I might have to give it a try.
Looks great and sounds so easy. I need to try the wax paper. I’m your newest Linky Follower:)
Thank you so much for posting this! I just downloaded a gorgeous french graphic from the GF and have been wondering – truly – how the hell I was going to be able to do it! This is perfect!
I found you through the WOW! So glad I did! I’m your newest…..
OH HOW I AM LOVING THIS! I cannot wait to try this! I wanted to do something to embellish my bathroom cupboards and this just might be the perfect thing! Thank you so much for sharing. I’m so glad I found your blog!
YES! I finally found this web page! I’ve been looking just for this article for so long!!
For me, design is like choosing what I’m going to wear for the day – only much more complicated and not really the same at all.
Data Cabling
I Like your site,iam sharing my friends excellent work.
utility brokers
Hi,
Need help, can i use wax paper for transferring wax on sheet of other paper
I’ve never tried it but I am assuming that the principles would still be the same. Let me know how it goes!
How can it be done.
I’m asking about whether to tranfer directly when the ink is wet or it can done even after the ink is dry.
Please help me .
You want to have the ink slightly wet so it will transfer but not too wet that it will smudge. Once it’s dry though, it won’t transfer.
The plant vase looks pretty cool.. Have done wax paper transfer for that too?
No, that was just how I bought it. 🙂