- Use a good stencil! I purchased mine through Cutting Edge Stencils and am so glad that I spent the extra money. I really could not imagine doing this with a flimsy or smaller stencil.
- Practice first! Try your stencil on a cardboard box or sample board first. There definitely is a little learning curve to figure out how much pressure and paint you should use.
- Tape off your mouldings and the edges of the walls that will not be painted with blue {low tack}painters tape. You will also need the tape to adhere your stencil to the wall.
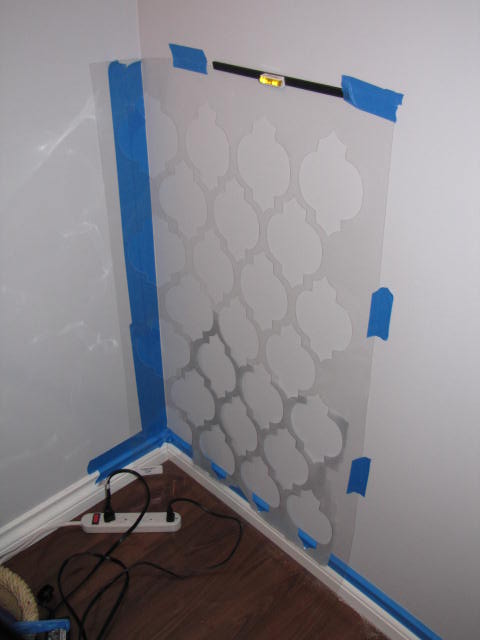
- Start on the area of the wall that will be seen the least. Since the bottom of my wall is covered with storage pieces and my desk, I started there {and am very glad that I did!}
-
Use a dense foam roller with rounded edges so that the edges of the roller do not catch the stencil.
-
This may seem extremely obvious, but make sure your stencil is level! Once the first few have been established it should get easier. You will need a level or a plumb line. I purchased this nifty little clip on level but did not realize that I did not have it attached straight to my stencil. My first three stencils ended up being crooked. See? I told you I was glad I started on the bottom!
- Make sure you have left over paint from your base coat to do touch ups. Little mistakes can be easily corrected with a little paint. I ended up touching up around the edges with the base paint a lot!
- Baby wipes or a moist Q-tip can also work well to correct the more minor mistakes.
- Remember that it is a stencil. That means that there will be a few imperfections unless you would like to spend hours on touch ups! Yes, I definitely had problems with this little fact…
- Less paint is better. It may mean that you have to go over your stencil a second time but it will save a lot of bleeding through. Just let the first coat dry for a couple of minutes before re-rolling.
- The edges of the wall were a big pain in the *@* for me. In the end, I found that it was much easier to just free hand them with pencil and then paint them in. I really wish that I would have figured this out a lot sooner!
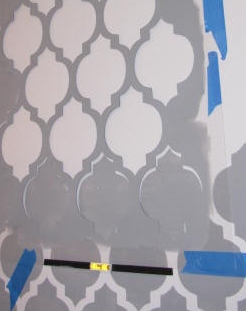

Really??? I’m still not done??? This is when I figured out how much easier it was to freehand and paint!

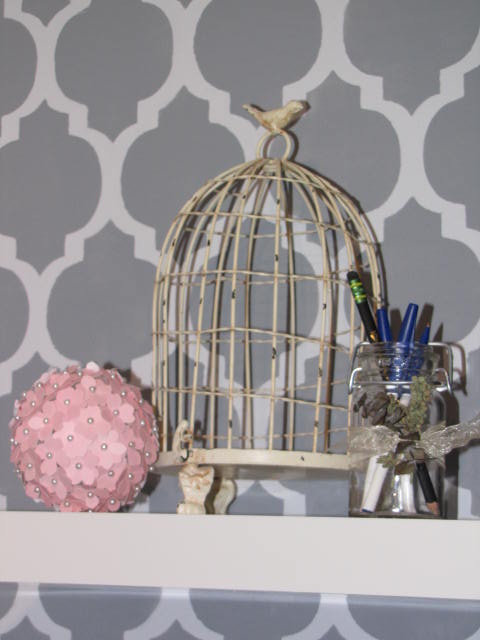
So the painting is done and you guys will just have to wait a little bit longer to see the craft room reveal. I totally forgot to take a picture of the completed wall before I started moving everything back in. {I think I was going a little crazy by this point}
Have a great week!
I linked up with Sew Crafty, The Girl Creative, The DIY Showoff, Under the Table and Dreaming, I Heart Naptime, Funky Junk Interiors, Be Different Act Normal, Tatertots and Jello, Whipperberry, Fingerprints on the Fridge, Tidy Mom, The Shabby Nest, Paisley Passions, House of Hepworths,Delightful Order, Passionately Artistic, Night Owl Crafting, Lil Luna, Blue Cricket Design, A Beach Cottage, This Blessed Nest, Sugar Bee Craft Edition, Today’s Creative Blog, Tip Junkie, Polly Want a Crafter, CRAFT and Craft-O-Maniac.

IT LOOKS GREAT!! I just got some stencils and am anxious and apprehensive at the same time to try them out! We’ll see how it goes. If it turns out as good as your did then I’ll be happy! Great Job!
i love this stencil! I want!!!
I love this stencil pattern too!!!!
It looks great and I love the pattern. I stenciled my a wall in my daughter’s room and couldn’t get over how long it took. I worked for hours and hours and hours. So, I feel your pain. Yours really looks amazing. I am your latest follower. I would love for you to come and check out my blog and follow me back at http://www.diybydesign.blogspot.com. Thanks so much.
I love this pattern! It looks great!
Awesome article. You did an amazing job, and all your tips are so helpful. I am going to link up on my new site DecorHacks.com! -heather
Great tips! I did a room border for my mom, and can’t imagine doing a whole wall.
~Kimberlee
http://www.TheSpunkyDiva.com
nice tutorial!
I am having a giveaway on my blog.
$40 store credit to get a drawstring backpack with an adorable applique, great from summer camp and trips and lovely spring hair accessories for girls. You just have to leave a comment to win.
http://houseonashwelllane.blogspot.com/2011/03/40-store-credit-free-shipping-from-o-to.html
beautiful work!
i don’t know if i have it in me to do this, but i love it! maybe this summer when it’s too hot outside, i’ll give it an attempt.
thanks for linking up to the Spring Fling.
kellie
love this look, very cool. i have a party going on if you’d like to share this. http://typeadecorating.blogspot.com/
This is wonderful! Great tips, thanks for sharing!
Beautiful! I did my own version of this exact pattern using a single template from Jones Design Co. Hours and hours {and HOURS!} of work, but it was worth it! My daughters’ bedroom walls are beautiful for it!! Check it out:
http://thewdesign.blogspot.com/2010/12/girls-room-makeover.html
Looks great!! Maybe I missed it – but how long did it take you? I’d love to stencil a wall, but all my walls are textured (from the builder with stucco). I don’t know if I’d have the patients! God Bless you for having them =)
😀 Lynda
This is fantastic! You are my hero… I would really like to try a project like this, but I am afraid that I might run out of patience before I finish or that I just plain screw it up badly! Your craft room looks awesome girl! Congrats on a beautiful job! Angie xo
Looks great – I just ordered a wall stencil so I’m keeping your tips handy for when mine arrives! Thanks!
Your stencil job looks flawless! I’ve been thinking about doing this too, but am still a little nervous about it! Thanks for posting this article!
It looks fantastic. I just stenciled our bathroom this week. Check it out if you get a chance. I’m your newest follower.
Love the wall treatment! Awesome job!
boy wish I had read this before doing my wall 🙂 The edges caused me to almost have a freaking breakdown! I also had a hard time getting the stencil to stick to the wall with the tape, letting it dry in between so you could line them up was hard for me! Probably bc I had a 2 year old underfoot and just wanted to be DONE. You did a great job though!!
Jenn this couldn’t have come at a better time! I just painted the base coat in my powder bath and I’ve been trying to decide what to do with it! Thanks for sharing. I’d love to have you join my VIP party today @ http://designergarden.blogspot.com/2011/03/vip-party-8.html
That looks so good. I just painted my craft room and half way threw the disign I painted over it and started from scrtach. http://www.mylifeunzipped.blogspot.com
Looks great so far! I’m a new follower and can’t wait to see how it turns out! 🙂
Fantastic job. You did a great job!
Sandi
Thanks so much for the pointers! I really want to stencil my pantry or closet wall fr practice before doing my bathroom and these will def help out. BTW, I used to love Trading Spaces! I too would be the one staying up all night!
Jen
Scissors & Spatulas
You did a wonderful job! I am officially obsessed with this pattern! I just did a dresser with it on the front. I really love that you expressed your UPS and DOWNS 🙂 What do you thing of this pattern done as a backsplash? just curious?
Thanks for sharing, Nikki
Wow! It looks amazing! I thought it was wallpaper. Awesome job!!!
Love it! And thanks for the tips! I stenciled a quatrefoil pattern on my desk, and I love it. But it was definitely a lot of work. 🙂
It looks great! The pattern looks like a Ballard cutain design which I am totally in love with. Thanks for sharing the great tips! I am your newest follower!
Great tips! I’m thinking about stenciling my craft room/office, but the amount of work is definitely intimidating. You’ve shared some really great advice!!
I love that stencil! Great post.
Sammy~
I think the stencil design is also good for office’s walls; like in a meeting room. For me, this design adds life to your room. If I have the time to change my wall’s design, I’d opt for Japanese stencil art designs.
I absolutely love that stencil pattern! I have been eyeing it for my foyer wall. Great colors too!
Heather
All I can say is WOW…LOVE it! Now, if only my husband would let me do that 🙂
I’d love it if you’d check out my Party on Tuesdays: http://itssewforyou.blogspot.com/2011/03/its-sew-fun-tuesday-6.html
All of your hard work paid off, Jenn! It’s a gorgeous wall! I love it! I love the tip about tracing the edges and painting in free hand – great idea! 🙂
Cutting Edge Stencils are awesome, aren’t they?
Thanks so much for sharing in the DIY Project Parade!
I am melting just looking at that wall. How striking. Why would anyway wallpaper when the effect of a stencil is just as gorgeous???
I’d LOVE if you could share this with my readers tonight @Creative Juice Thursday. Party starts @ 7pm CST. Get your crafting shoes on. Hope to see you there…
Oi querida, gosto muito do seu blog e postei a transformação do craft room no meu log espero que não se importe.
beijos
casadadani.blogspot.com
I came across this through Craftaholicsanonymous.com when you guest posted on her blog and it instantly caught my eye …. as I’ve done the same stencil! 🙂
http://pbjstories.blogspot.com/2011/05/diy-painted-curtains-tutorial.html
I love your space it’s so inviting and inspiring! great job 🙂
Pamela @ pbjstories.blogspot.com
I love wall stencils and really appreciate how much effort you have put in to creating this effect.
But the results are well worth it!
does look fabulous – question is – is there a wallpaper somewhere out there with the same pattern so that we can do it without the stencil mission? xx
Wow! It looks absolutely amazing! We just redid our laundry room and I had originally planned to do a similar stencil. I didn’t order one so I tried to trace one and paint in by hand. Simply a disaster waiting to happen. Anyhow I quit. But yours look so amazing that it almost makes me wish I hadn’t. C’est la vie. Thanks for sharing this!
Krista @thehappyhousie