• Home
  • About Me
  • Holidays
    • April Fools
    • Birthdays
    • Christmas
    • Easter
    • Halloween
    • St. Patrick’s Day
    • Thanksgiving
    • Valentines Day
    • Summer
    • Fall
    • Winter
  • Get Organized
    • The Household Organization Diet
    • Cleaning
  • Project Gallery
    • Crafts
    • Design and Decor
    • Recipes
    • Fun for Kids
  • Home Tour
  • Shop My Favorites
  • Contact Me

Clean and Scentsible

A Little Taste of Spring

  • Share
  • Tweet
Happy Monday!  I hope everyone had a great weekend.  Dave and I had a fabulous weekend away in Vancouver with lots of relaxation time.  We had a gorgeous suite overlooking the ocean and Stanley Park.  The sun was shining and the taste of Spring was in the air.  And then today…SNOW!!!  Such is life on the Westcoast!!

Well, I didn’t let a few flakes of snow stop me from looking forward to Spring.  And to bring a little Spring inside, I created this paper tree:

MATERIALS

  • Styrofoam cone form 
  • wood dowel or stick
  • paint
  • scrapbook paper in 4-5 different patterns {My paper is from My Mind’s Eye}
  • 2 inch circle punch
  • glue {I used Quick Grip}
  • black ink
  • berry twigs
  • tin or ceramic pot
  • Spanish moss
  • Styrofoam ball or florist foam to secure the tree in the tin

TO DO
First off, sorry about the lack of photos.  Our camera broke a couple of weeks ago so I was using a really old one and most of the pictures ended up blurry.  It’s an easy project to do though so I am sure you will be fine!

  • Before you get going, poke the wooden dowel into the bottom of the cone and then remove it.  {It is easier to get the hole set before you add the paper.}
  • Trace the bottom and top of your cone onto the scrapbook paper.  Cut out the circles and glue to the bottom and top of your cone.  {This is the large pink circle on the bottom of the cone}

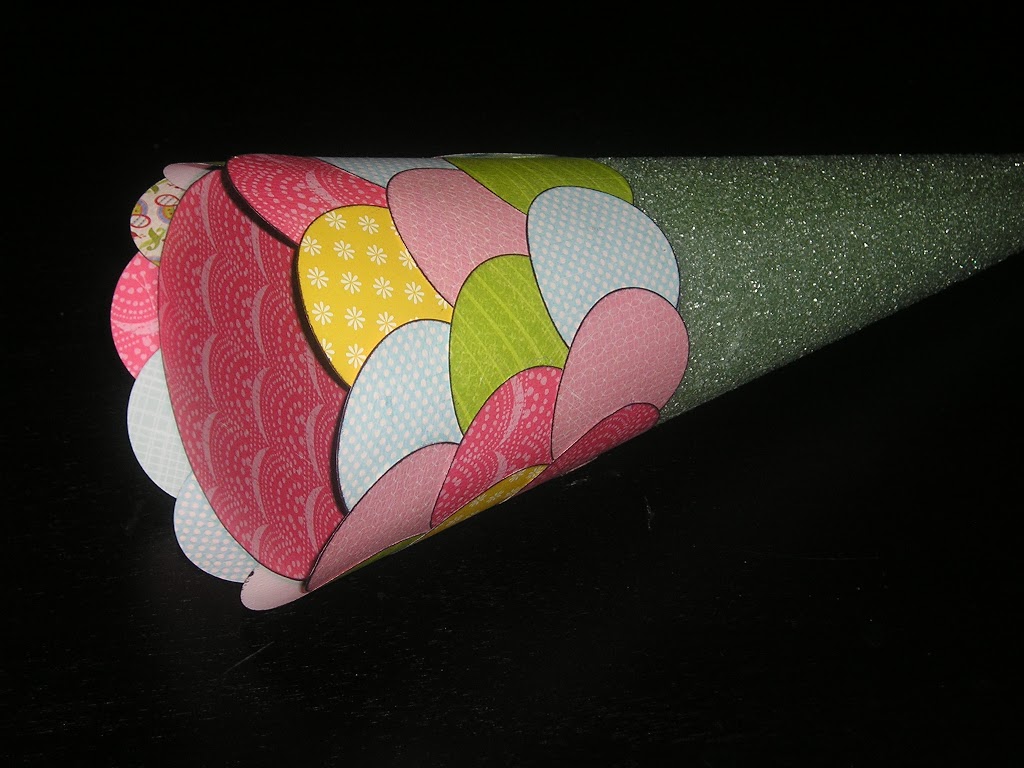
  • Punch out circles from the patterned scrapbook paper.  Ink the edges with black ink.
  • Starting at the bottom of the cone, start gluing on the circles overlapping them as you go.  I just ended up placing glue on the top half of the circles.  You do not need to cover the whole thing.
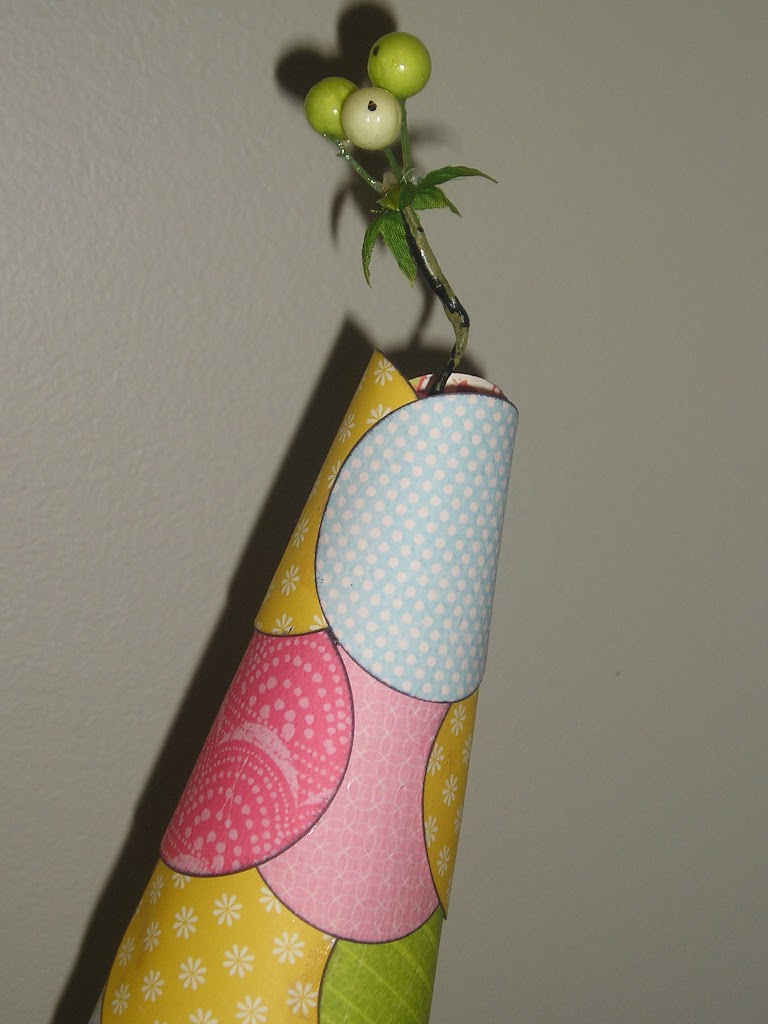
  • Work your way up to the top of your tree.  At the very top I wanted my circles to extend over the top of the tree form.  You could also add an additional row of circle if you wanted it to come more to a point.

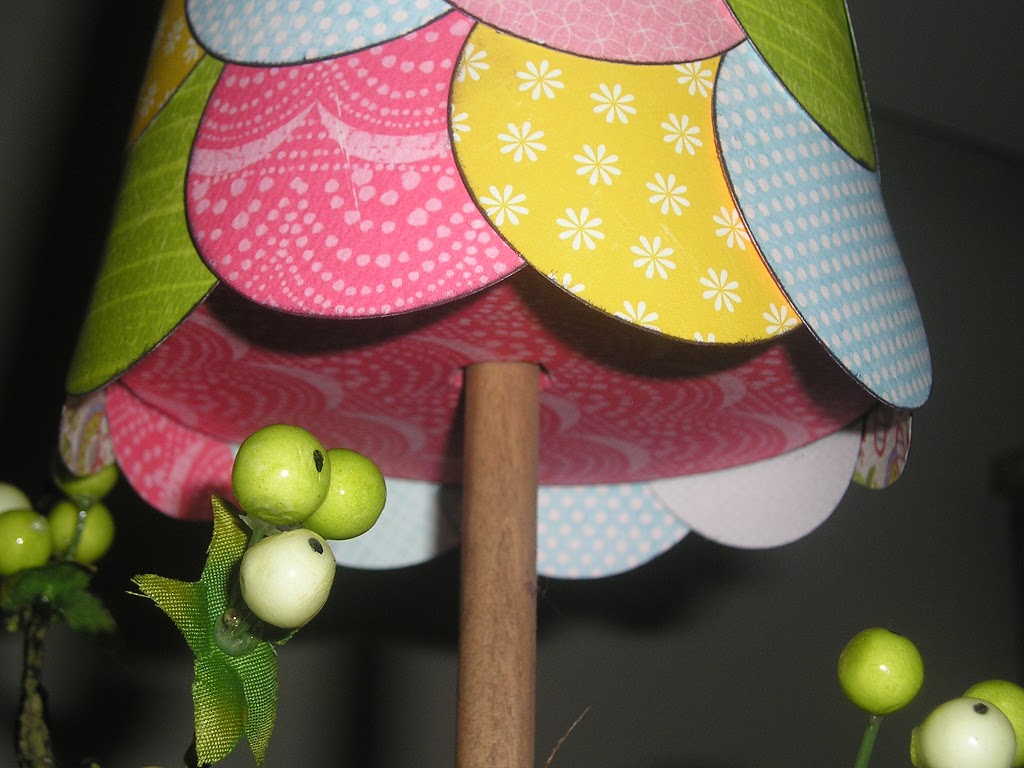
  • Paint the wooden dowel dark brown.  Poke a hole through the paper in the bottom of the cone form to line up with the dowel hole that you made at the beginning of the project.  Insert the dowel.
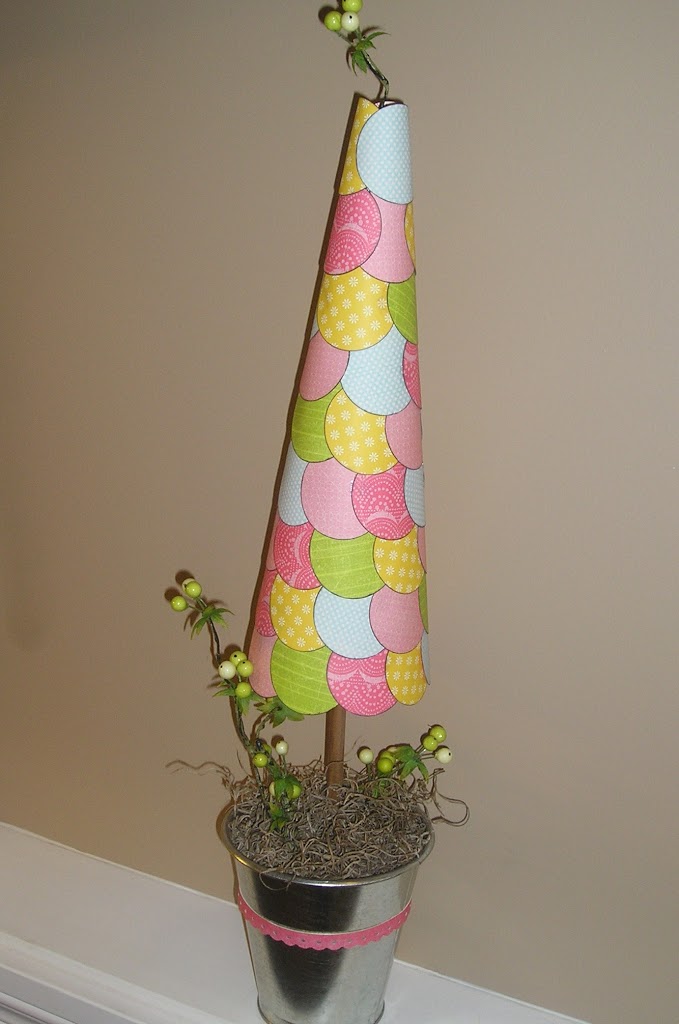
  • To get the tree to stay upright in the tin, I placed an old Styrofoam ball that I had lying around in the middle of the tin and then shoved cardboard pieces around it until it was a snug fit and the ball was stable. {You could also use florist foam.}  Stick the dowel into the ball and add some Spanish moss on top.
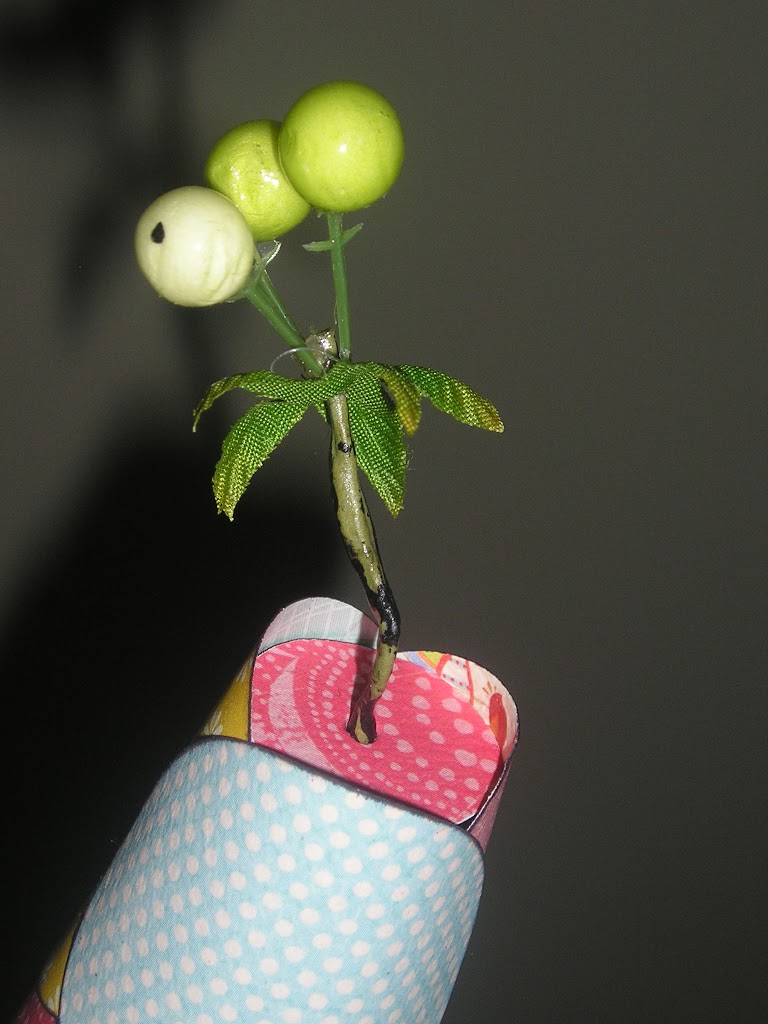
  • I added a few berry twigs to my pot and the top of my tree.  Add ribbon or other embellishments around the pot.
And there you have a cute little tree to tide you over until Spring!

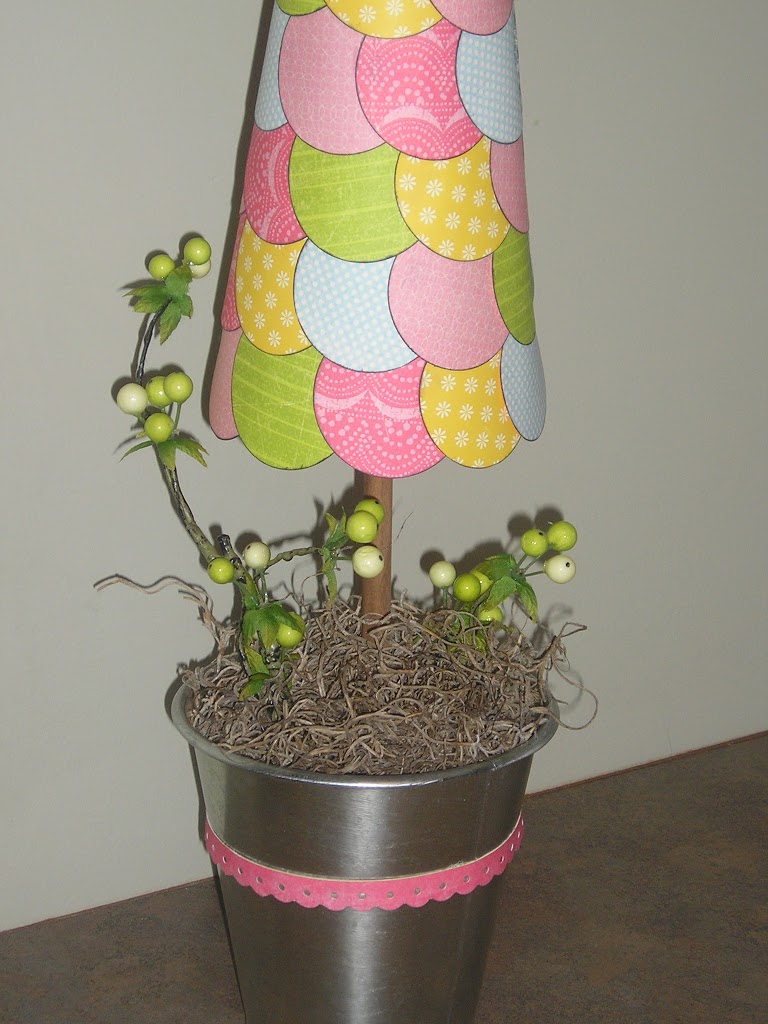
My tree is looking a little crooked from this angle but I promise that it is actually straight!  Hope you all have a great week!

I have linked up with these wonderful blogs: Nest of Posies, The CSI Project, This Blessed Nest, The Stories of A to Z, Polly Want a Crafter, Craft Goodies,  DIY Showoff, Craft-O-Maniac, CRAFT, I Heart Naptime, Under the Table and Dreaming, Be Different Act Normal, Tatertots and Jello, Fingerprints on the Fridge, Tidy Mom, Frou Frou Decor, The Speckled Dog, The Shabby Nest, Chic on a Shoestring, House of Hepworths, Katie’s Nesting Spot, The Shabby Chic Cottage, Night Owl Crafting, Somewhat Simple, Passionately Artistic, Blue Cricket Design, These Creative Juices, Tip Junkie, Paper Issues, Today’s Creative Blog, and The Lettered Cottage.

l

Subscribe

« Ode to the Clothes Peg
The Story of Big Blue »

Comments

  1. Jaderbomb says

    February 22, 2011 at 2:21 pm

    This is SO cute!!!

    Reply
  2. Tashia says

    February 22, 2011 at 3:39 pm

    This is really cute! Love it!

    Reply
  3. Tori says

    February 22, 2011 at 11:58 pm

    This is fabulous! Can I ask a question? How in the world do you dream up all the things you do? I am SO envious of you and your crafty mind!!

    Reply
  4. Jackie says

    February 23, 2011 at 1:22 am

    So cute, <3 it!

    Reply
  5. Catch A Falling Star says

    February 23, 2011 at 4:45 am

    Aww, it’s so adorable!
    I love the colors and patterns.

    Reply
  6. Lacey says

    February 24, 2011 at 12:52 am

    How sweet!.. This is just darling!.. Love it!..

    Reply
  7. Grannys Attic says

    February 24, 2011 at 5:18 am

    That is just so “Spring” cute! Great job. Have a wonderful day, Vicky

    Reply
  8. Suzy says

    February 24, 2011 at 2:17 pm

    Very cute! I love the springy colors! I would be thrilled if you stopped by my Commercial Break Thursday at http://www.suzyssitcom.com and linked this project!

    suzy

    Reply
  9. Lindy says

    February 24, 2011 at 4:53 pm

    This is so cute! I am going to have to keep that in mind as a craft. Stopping by from itsybitsypaper.blogspot.com

    Reply
  10. Terry says

    February 26, 2011 at 1:31 am

    Super cute. Love it.

    Reply
  11. Emily says

    February 27, 2011 at 5:40 am

    I love the things you create with scrapbook paper and this is no exception! The tree is adorable and perfect for spring time.

    Reply
  12. Jen-CraftOManiac says

    March 2, 2011 at 3:30 pm

    cute, and sweet. Perfect for spring. winks-jen

    Reply
  13. Sue says

    March 5, 2011 at 2:51 am

    Hi I’m new to your blog and I am enjoying it. You have lots of great ideas. I was wondering where did you get your owl graphic from? It is very cute.

    Reply
  14. Gretchen says

    March 6, 2011 at 5:13 am

    this is so fun!!

    Reply
  15. this blessed nest says

    March 11, 2011 at 1:17 am

    how fun! i love scrap paper. it makes the world happy with all the different patterns.

    thanks for sharing!
    kellie

    Reply
  16. Sommer says

    March 11, 2011 at 5:50 pm

    This is a FANTASTIC project. Great idea! I would be delighted if you would link this to my VIP party today! http://designergarden.blogspot.com/2011/03/vip-party-6.html

    Cheers!
    Sommer

    Reply
  17. La-Dee-da crafter says

    March 12, 2011 at 3:49 am

    Soo cute!!! love it.
    ladeedacreations.com
    Thanks for sharing.

    Reply

Trackbacks

  1. Moss Initial Wreath - Clean and Scentsible says:
    December 4, 2013 at 1:02 am

    […] interest to my boring ol’ L, I added some berry twig branches that were left over from my Spring tree and Butterfly projects.     I attached the letter with hot glue to the grapevine wreath.  The […]

    Reply

Leave a Reply Cancel reply

Your email address will not be published. Required fields are marked *

Recipe Rating


This site uses Akismet to reduce spam. Learn how your comment data is processed.

Put Your House on a Diet

The Home Organization Diet. Put your home on a diet for a clutter-free, happy, and healthy home!

Meet Jenn

Hi there! I'm Jenn, mommy to two busy {and very cute!} boys and wife to a very tolerant hubby. I love all things crafty and creative and have created this blog to share my ideas and favorite finds. I hope you enjoy your visit! Read More…

Connect with me

  • Facebook
  • Instagram
  • Pinterest
  • Twitter

Subscribe

Get all our latest posts directly to your inbox

Looking for Something?

Categories

Archives

Subscribe

Latest from Instagram

[instagram-feed num=9 cols=9 showheader=false showbutton=false showfollow=false]

Copyright © 2026 · Clean and Scentsible LLC · All Rights Reserved · Privacy Policy