Happy Saturday! I hope you are all enjoying your weekend. We have had a couple of very busy days around here – the craziness of December has definitely begun! Last night we were at our Santa Clause Parade and Matthew managed to complete the long {and cold!} walk in the parade. After getting home around 10:00, we were up bright and early this morning for the kids’ party at my work and then rushed around to get ready for Matthew’s birthday party this afternoon. I foresee a very lazy night in our P.J.s ahead!
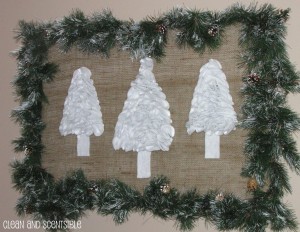
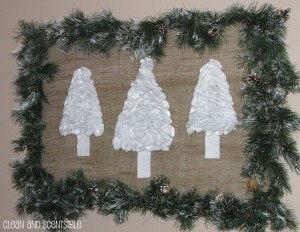
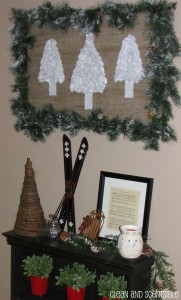
A couple of weeks ago, I was visiting over at Under the Table and Dreaming for Stephanie Lynn’s Handmade Holidays series. There were some AMAZING projects showcased so if you haven’t had a chance to check it out, you must take a peek!{you can click over on the button on my sidebar} Here is my Ruffled Tree Art.
MATERIALS
- STYROFOAM Brand Foam 24″ x 36″ x 1″ sheet
- burlap {at least 28″ x 40″}
- white felt
- floral pins
- straight pins
- garland
- wire clippers
- white paint
- foam paint brush
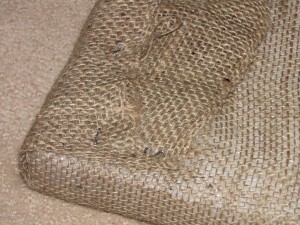
To begin, cover your STYROFOAM Brand Foam sheet with the burlap. Secure on the back with the floral pins. Using a single layer of burlap allows for a little shimmer of the Styrofoam to peak through. If you want a more opaque look, double up your burlap layer.
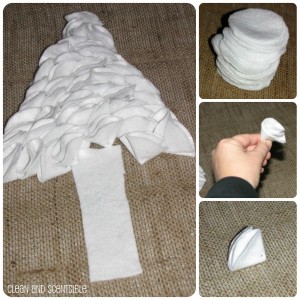
Use a stencil to trace out 3 inch circles onto your felt. I used a ribbon wheel for my stencil and cut out four circles at a time. You will need lots and lots of circles!!! I lost count but I must have used around 200.
Start with the larger center tree. Measure approximately 4-5 inches down from the center of the top of the sheet and begin to pin your circles. For the circles, fold each circle in half. Fold in half again, place the straight pin through all 4 layers and attach to the foam board. Continue to fold and pin your circles to create a tree form. Fluff the edges up a bit on the bottom layer to cover any pins that are showing.
For the stump, I cut out a rectangular piece of felt and just pinned the bottom three rows of circles over it to secure it. Since I didn’t glue it down, I can always re-use the burlap for a future project, if I decide to change things up in the future. Repeat the same process for the smaller trees on either side of the large tree.
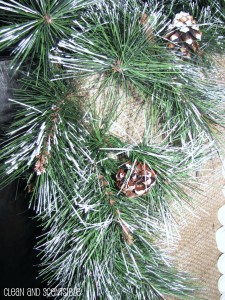
Once I was done I thought things looked a little plain, so I decided to add some garland around the edges. Using wire cutters, cut small pieces of greenery and layer along the sides of the foam sheet. Attach with the floral pins. Since the trees were white, I added some white paint to the greenery as well using white acrylic paint and a foam brush.
I had a couple of hooks already on the wall from some previous art work that was hanging there. I added some duct tape to the back of the STYROFOAM sheet to reinforce the foam where the hooks were going to hit and stuck it on.
You could also use smaller sheets of Styrofoam and frame them as well. Since everything is just pinned down, it can all be removed and re-used once the holidays are over!
Enjoy your weekend!
I linked up with Tatertots and Jello, Whipperberry, Thirty Handmade Days, Freckled Laundry, Tidy Mom, The 36th Avenue, Somewhat Simple, Crafty Scrappy Happy, Delightful Order, Blue Cricket Design, Tip Junkie, Thrifty Decor Chick, My Crazy Beautiful Life, Craft-O-Maniac, CRAFT, Six Sisters’ Stuff, Positively Splendid and I Heart Naptime.

I love how it turned out! You can never go wrong with ruffles!! I’m your newest follower from the I Heart Nap Time party. If you get a chance, I’d love you to stop by my blog & maybe follow along too.
Sally
loveofhomes.blogspot.com
Jen!!! This is a really adorable idea…I love it on the wall atop of the bookshelf…Thanks for sharing on my “25 Days of Christmas” Linky Party…You are the best!!!
http://www.mydailyphotojourney.blogspot.com/
http://www.facebook.com/MyCrazyBeautifulLife.13
http://www.pinterest.com/denyse13/
I Love this! Great job!