It seems like many of you have been enjoying summer vacation for a while now, but Matthew’s last day of school is tomorrow. I’m not sure who is more excited! I created these little treat bags for Matthew to hand out to his classmates.
I got the idea from these treat bags that I found on Pinterest {big surprise I know!}.
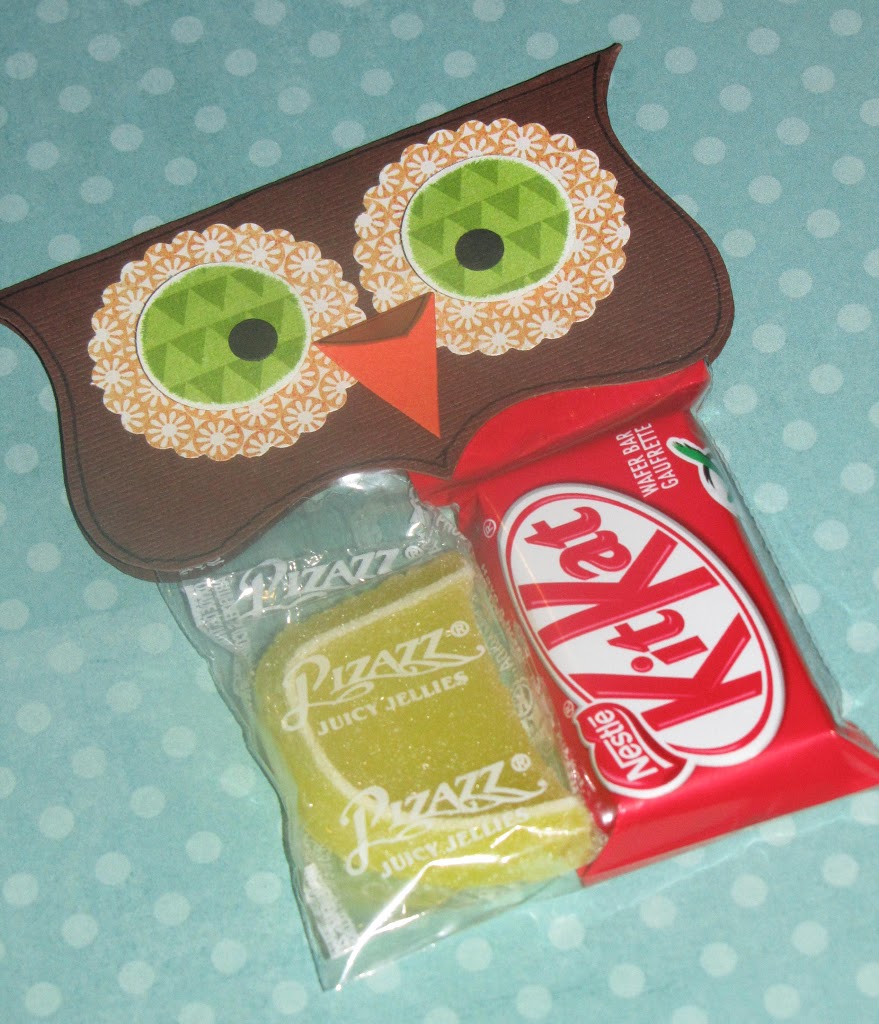
Here’s the How To:
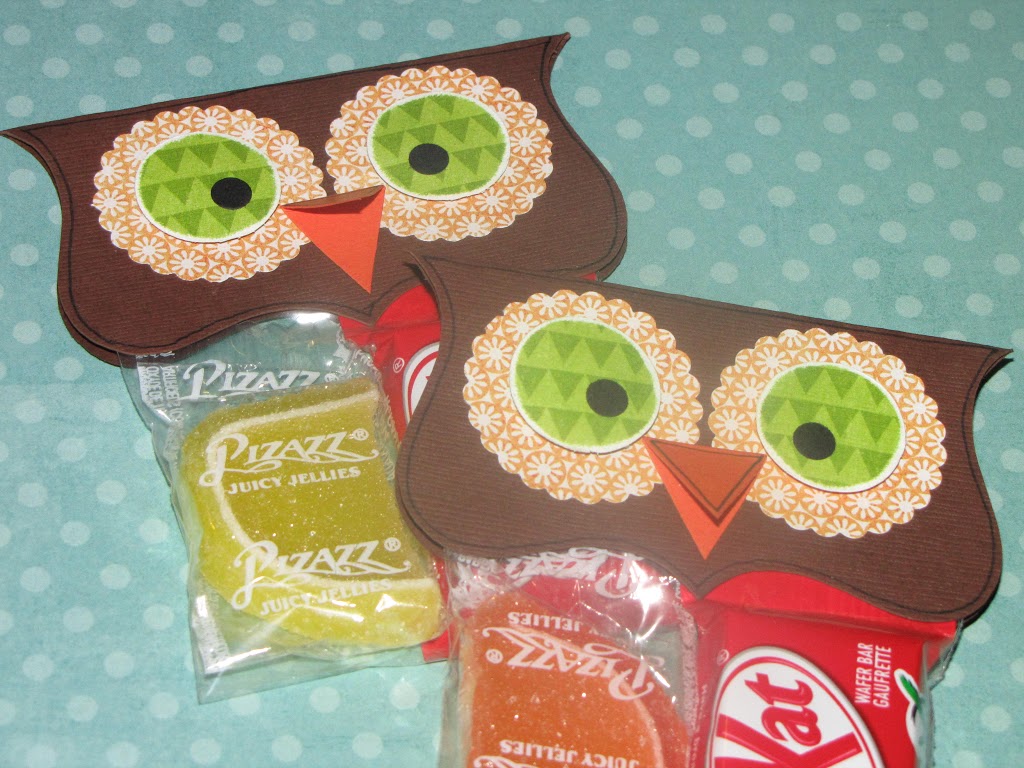
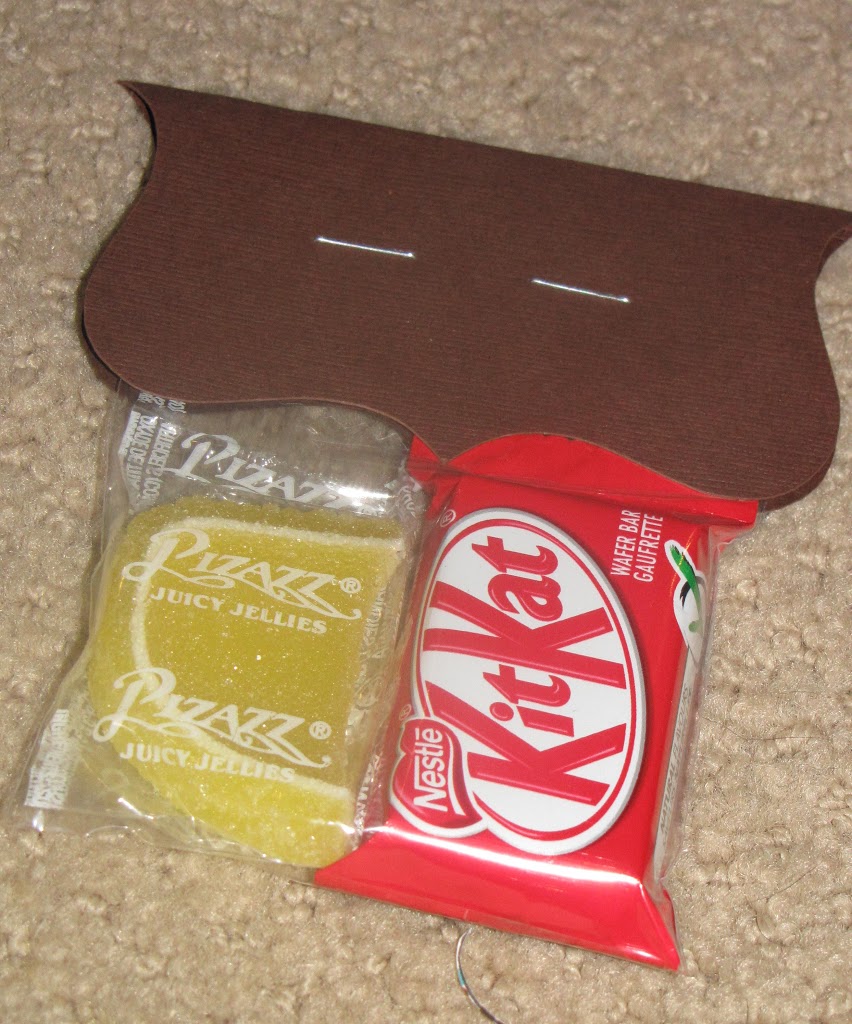
- Fill treat bags with whatever treats you would like. Gummy worms would be cute {owls eat worms right?} but I wanted to use wrapped candy since we were handing it out at school. I used small clear bags (3×4) that I purchased from the dollar store but bigger baggies could always be used depending on what you were filling the bag with.
- For the owl head, I downloaded the fancy frame from the Silhouette site and cut it out. {If you don’t have a Silhouette, many scrapbook stores also carry this die cut or you can just create your own template}. Fold the frame in half.
- Staple the head to plastic treat bags. DO NOT GLUE THE EYES ON FIRST!
- For the eyes, I used a 1 1/2 inch scallop punch, a 1 inch circle {which I cut out with my Coluzzle} and a hole punch for the small black circle. I sanded the edges of the green circle and attached it with pop dots.

- Glue the eyes to the head covering up the staples.
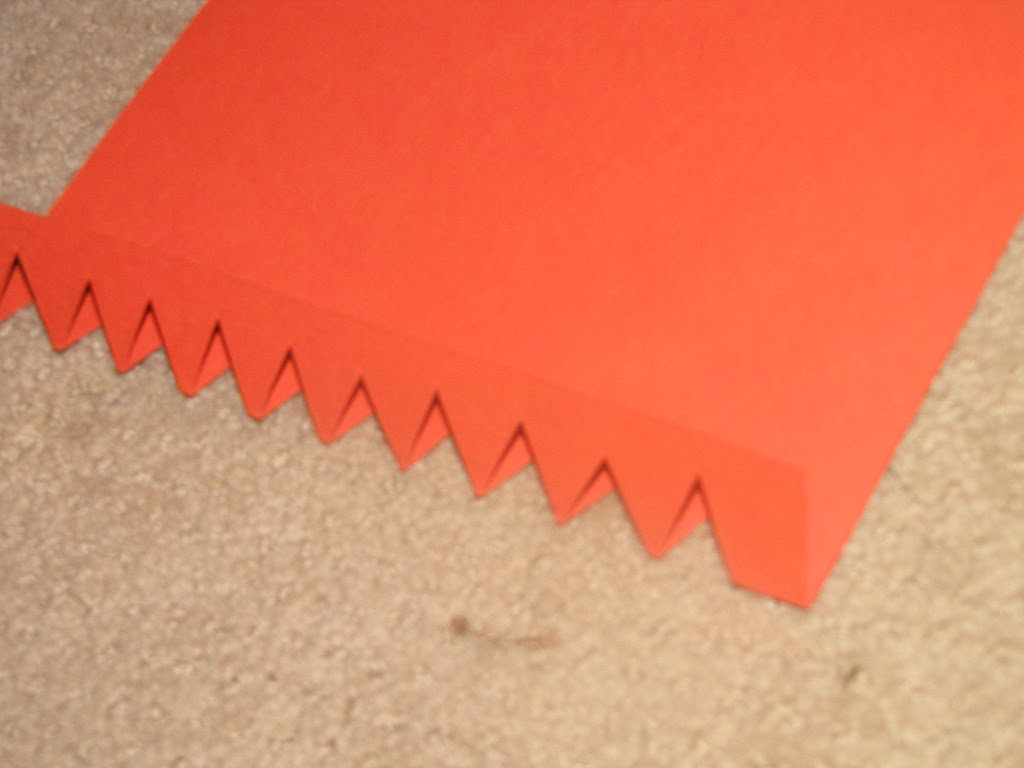
- Cut out a beak from orange cardstock. I folded the paper over and cut out a triangle to get a 3-D effect.
- Attach the beak with double sided tape.
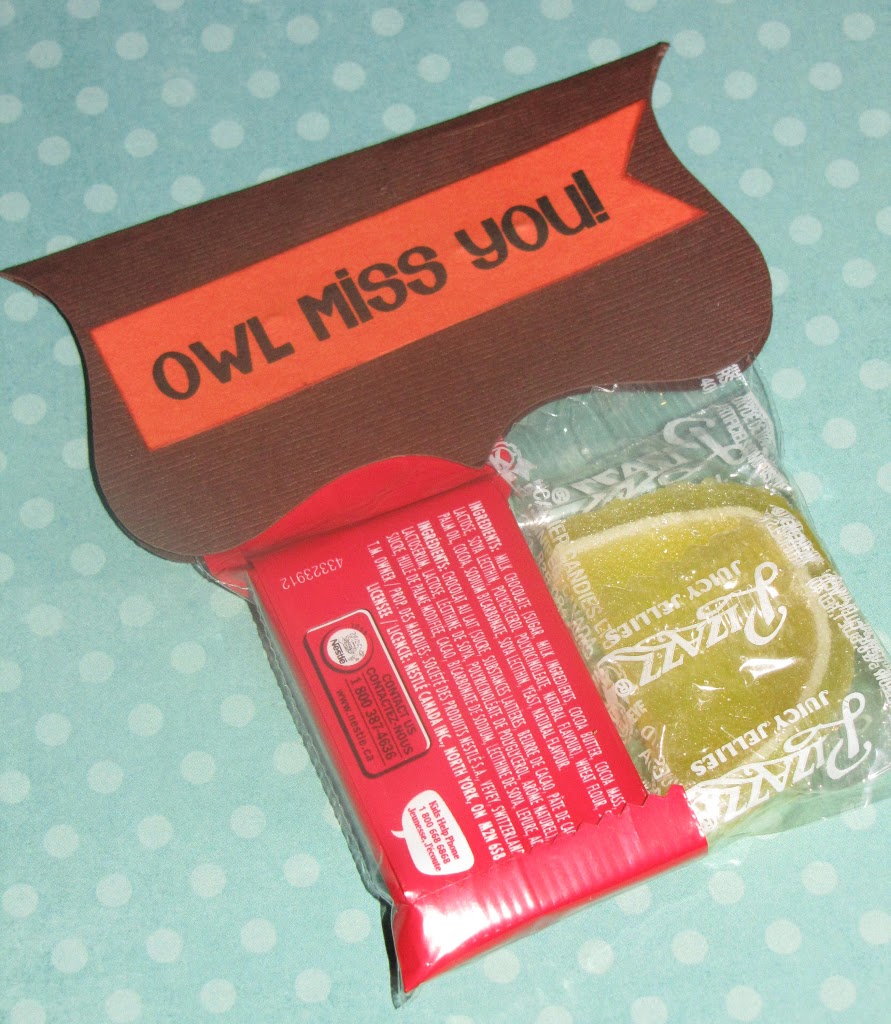
- Add a little strip of paper to the back of the owl head to cover up the staple marks. I love cheesy sayings!
Now repeat 22 times!
I think they turned out pretty cute! 🙂

Have a great week!
I linked up with Tip Junkie, Ask Anna, Embellishing Life, CRAFT, Under the Table and Dreaming, I Heart Naptime, Be Different Act Normal, Tatertots and Jello, Somewhat Simple, The Shabby Chic Cottage, Confessions of a Stay At Home Mommy, Skip to My Lou, Lil Luna, Home Stories of A to Z, Design Dazzle, The Girl Creative, Craft-O-Maniac, The Shabby Nest, Fingerprints on the Fridge, Smile Monsters, Tidy Mom, At the Picket Fence, Paisley Passions, The Shabby Chic Cottage, House of Hepworth’s, Katie’s Nesting Spot and Delightful Order.

oh so cute Jen!!! so creative.
Really cute! These would be great favors for an owl-themed party too! Thanks for the tutorial!
Super Duper CUTE! This, of course, is one if the reasons you don’t have time to blog…but if you weren’t making a zillion crafts how on earth would you share tutorials?
So, so pretty
I’ll be remembering this post
I looooove these! And the teacher owl bags too! I’m always looking for fun crafts to do with my son, and this morning as I looked at this, he was sitting next to me, saw the pics, and said, “I want to make that owl. I want to make it right now, today.” So, thanks!
This is awesome! I’m pinning it!
I love these!! I’d love for you to share them at Fun For Kids Friday.
http://smilemonsters.blogspot.com/2011/06/fun-for-kids-friday_30.html
Jo @ SmileMonsters
What a sweet little post and so very true.
These are adorable, such great inspiration for an owl party that I am having. I would love if you would share this at my July “It’s a Celebraion” link party. Everyone should see these!
Christina
http://www.inspirationforcelebration.com
These owls are so adorable! I’d really love to have you post this on my linky party!!! The party is open for a few more days.
becca-homeiswheremystorybegins.blogspot.com
Becca
I did something similar! very cute.
How sweet! My daughter has developed a love of owls, so I will have to make these. I would love it if you would link up to my Tuesday Confessional link party going on now: http://www.craftyconfessions.com/2011/07/tuesday-confessional-link-up-2.html. I hope to see you soon!
~Macy from Confessions of a SAHM
Absolutely adorable!!!
how sweet!!! i love this idea! 🙂
http://jaysonandashley.blogspot.com/
These are ADORABLE! They would be great for an owl party as well.
Sharing this with my Facebook readers!
these are so cute, great tutorial!
You got the idea off Pinterest and I just pinned these (which I love more than the inspiration) – go figure! 😉
Very cute!! Love the little saying on the back — so appropriate!
This is adorable! Thanks for sharing.
these are really cute thanks for sharing with me I think this will be used sometime this fall come see me at http://shopannies.blogspot.com