Oh how I love Fridays! It has actually been a fairly productive day around here today despite the kids being home for another snow day {well, more like a freezing rain day!} I have been doing “power hours” all morning – one hour of work {with the timer set!} and then one hour of play. For some reason this seems to focus me a bit more and I have actually got lots of cleaning done! I am almost feeling caught up for the first time in MONTHS!
So I have been continuing to have fun playing with all of my Valentine’s papers this week. The boys are getting a little tired of all of my pink and asked today when I would be doing some boy projects. Sorry boys.. if you want the chocolate you must put up with a little pink!!
Here’s a cute and easy little Valentine’s Day treat box that is perfect for holding some chocolates, a little gift, or some sweet homemade goodies!
So I have been continuing to have fun playing with all of my Valentine’s papers this week. The boys are getting a little tired of all of my pink and asked today when I would be doing some boy projects. Sorry boys.. if you want the chocolate you must put up with a little pink!!
Here’s a cute and easy little Valentine’s Day treat box that is perfect for holding some chocolates, a little gift, or some sweet homemade goodies!
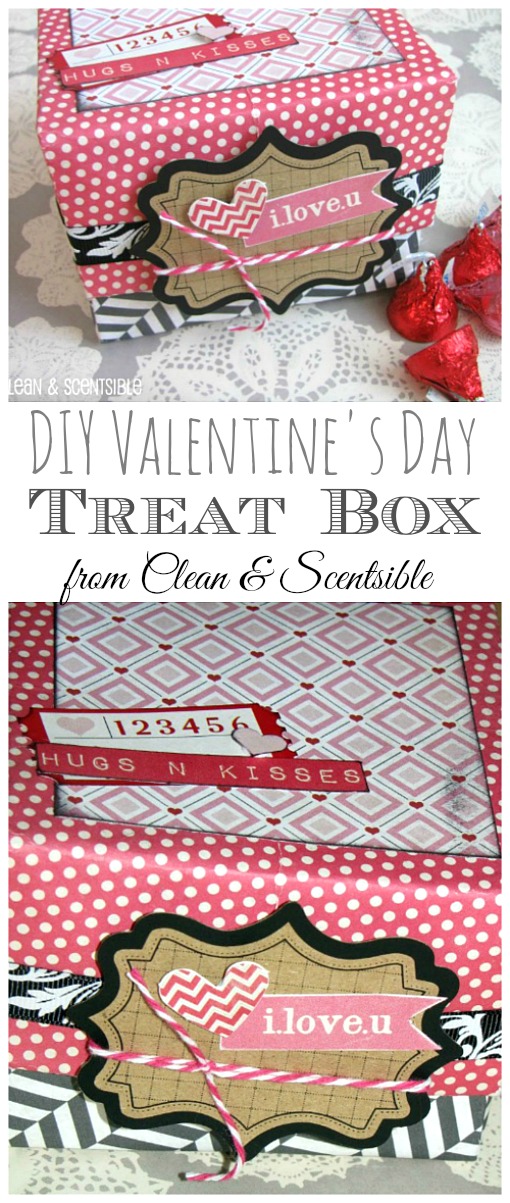
I made one of these oragami boxes at a scrapbook course a few years ago and ended up disassembling it to try and figure out how it was made. It was a little tricky taking pictures of the process but it is quite easy to do. Hopefully you will be able to understand my instructions!
Materials
Materials
- 2 pieces of coordinating 12 x 12 scrapbook cardstock {mine are from Echo Park and My Mind’s Eye}. Trim one of the pieces to 11 3/8 x 11 3/8. You will also need another piece of paper for the top of the box measuring 3 1/2 x 3 1/2 inches.
- ribbon
- embellishments of your choice. The Valentine’s embellishments that I used are from Echo Park and My Mind’s Eye as well as a little baker’s twine and a tag from Maya Road.
- black ink and a sanding block
- pop dots (optional)
- glue
- double sided tape
Instructions
Your 12 x 12 piece of cardstock will be the lid and the 11 3/8 inch cardstock will be the bottom of the box. They are both made using the following folding patterns. Make sure your lines are as crisp as possible!
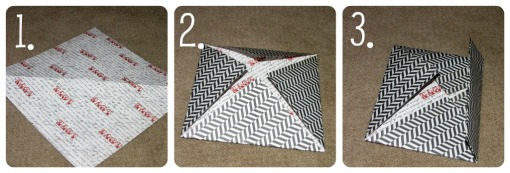
STEP 1– Put your paper down with the pattern you want on the outside of the box facing up. Fold the paper in half on a diagonal. Open up the paper back up and fold it on a diagonal again {so your creases form an ‘X’}.
STEP 2 – Flip your paper over so that the pattern that you want on the inside of the box is facing up. Fold each corner into the center of your paper {where the center of your ‘X'” is}.
STEP 3 – Keeping your paper folded as above, fold in two of the opposite edges to the center so you have a rectangle {I have folded the edge on the right in on the photo and still need to fold in the edge on the left}.
STEP 2 – Flip your paper over so that the pattern that you want on the inside of the box is facing up. Fold each corner into the center of your paper {where the center of your ‘X'” is}.
STEP 3 – Keeping your paper folded as above, fold in two of the opposite edges to the center so you have a rectangle {I have folded the edge on the right in on the photo and still need to fold in the edge on the left}.
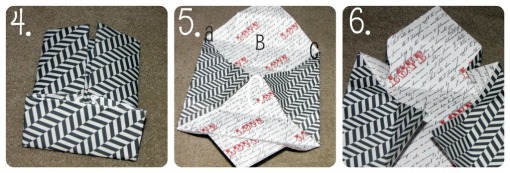
STEP 4 – Now fold in the other two opposite edges to the center. You should now have a square.
STEP 5 – Undo the top and bottom folds and then the left and right folds. Undo the top and bottom flaps. It should now look like the picture in step 5.
STEP 6 – Fold in point A to touch point B and then fold in point C to touch point B. {The ends that I folded in popped out when I took the picture but hopefully this gives you an idea. See those ‘V’s near the top on the right and left sides? They should be touching in the center where point B is.}
STEP 5 – Undo the top and bottom folds and then the left and right folds. Undo the top and bottom flaps. It should now look like the picture in step 5.
STEP 6 – Fold in point A to touch point B and then fold in point C to touch point B. {The ends that I folded in popped out when I took the picture but hopefully this gives you an idea. See those ‘V’s near the top on the right and left sides? They should be touching in the center where point B is.}
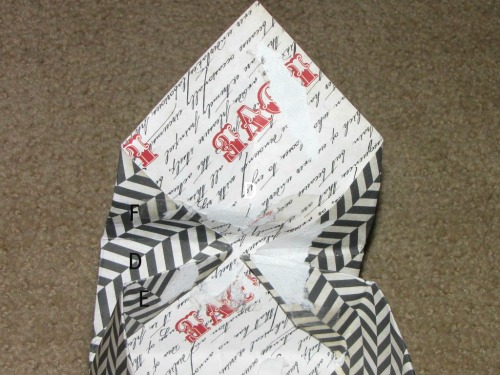
{Please excuse all of the ripped paper! I had glued it together and then realized I didn’t take a picture of this step so I tore it up again. All the tears are covered when it is folded up so it is all good!}
STEP 7 – Okay, here is where it gets a little tricky to explain. You basically need to fold the back of E into D. You then fold F up and over onto E. Repeat on both sides to form two corners of the box. Then repeat the whole process on the other end.
Once your box is completed, glue or use double sided tape to adhere the flaps on the inside of the box. Ink the edges of the 3 1/2 x 3 1/2 piece of cardstock and adhere to the top of your box.
STEP 7 – Okay, here is where it gets a little tricky to explain. You basically need to fold the back of E into D. You then fold F up and over onto E. Repeat on both sides to form two corners of the box. Then repeat the whole process on the other end.
Once your box is completed, glue or use double sided tape to adhere the flaps on the inside of the box. Ink the edges of the 3 1/2 x 3 1/2 piece of cardstock and adhere to the top of your box.
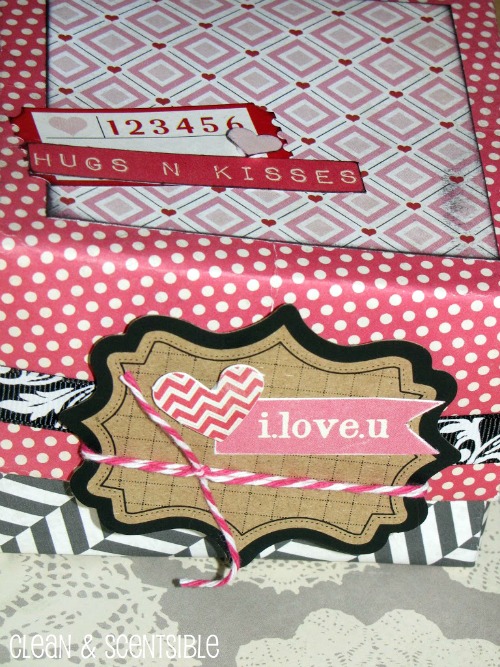
Wrap ribbon around the middle of your lid using double sided tape to adhere. {Start laying down the ribbon in the center of one of the sides so that it can be covered up with your tag}
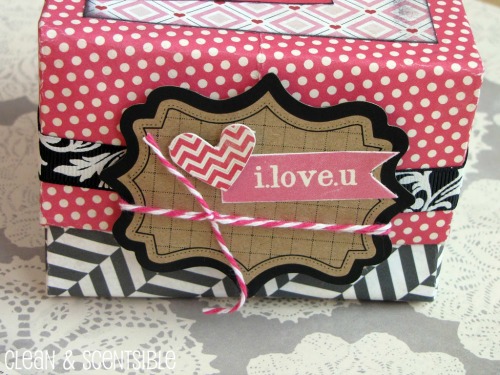
Use a tag {or other embellishment} to cover the ribbon where the ends join up.
I hope that all makes sense. Just give me a shout if you have any questions. I promise that they are really quite easy to do once you get the hang of it! Keep this in mind for other holidays or special occasions and just change up the paper.
Now what should I put inside? Those chocolates are long gone!
Now what should I put inside? Those chocolates are long gone!
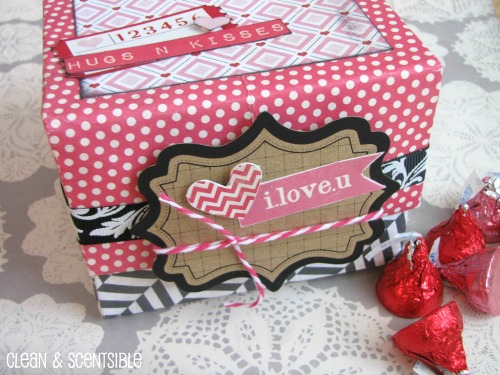
Your treat box is beautiful. Thank you for the tutorial.
Tee
http://tee-myspot.blogspot.com/
I love your “power hours” idea! I agree…they need to just deal w/ the pink for a little bit!
Really pretty….I’d love for you to share this @CountryMommaCooks
Link & Greet party…going on now-Sunday…have a great weekend!
I love it, it is so cute.
Rhonda
This is so cute! love love love!
Very sweet box…I love paper crafting but haven’t done it in a while – this is a cute project that I might try!
Please stop over to enter my giveaway for digital scrapbook software!
Cute packaging!
So cute! I hope you stop by my party and link up.
-Melissa
So cute and a great tutorial! We’d love for you to come by and link up at our party! http://housewivesofriverton.blogspot.com/2012/01/one-year-blogaversary-and-new-linky.html
Wow! Who needs a treat inside when the packaging is that pretty? Thanks so much for sharing Jenn!
What a beautiful project! Would you be willing to link this up to my Valentine Link Party going on now? I’d love to have you! Thanks, Michelle
http://michellepaige.blogspot.com/2012/01/rockin-valentine-valentine-link-party.html
I’ve always wanted to know how to make one of those boxes. We’re going to a birthday party this weekend and gifting a gift card. I’ve been looking for a fun way to present it. Pinning this so I can come back once I picked out the paper to use!
too cute!! I love it!
Thanks for linking up this week! I featured you post in my wrap up http://tidymom.net/2012/valentines-day-crafts-food-decor/
have a fabulous Sunday!
Okay now this is just genius. I LOVE the papers you used and how you decorated it. Doesn’t baker’s twine make everything prettier? You’re amazing, Jen!
These are so cute and I love how easy they seem to make. The box turned out great!
I am hosting a Valentine’s project link party until 2/14. I would love it if you came and linked these up! http://justusfourashe.blogspot.com/2012/01/xoxo-oh-and-linky-too.html
What a fun valentine project to make! I’d love for you to submit this to the M&T Spotlight http://www.makeandtakes.com/spotlight
I found you on Tip Junkie. Would you please share this with my readers for our Fun Stuff Fridays Valentine’s Linky Party? I think it would be a great fit. http://www.toysinthedryer.com/2012/02/14-days-of-valentines-fun-stuff-fridays.html
Your treat box is beautiful. Thank you for the tutorial..i wish to use it when design Gift Card envelopes.