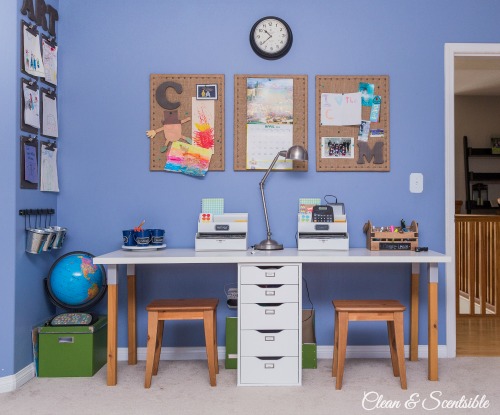
Well here is my final project for the kids’ craft space – easy DIY Burlap Bulletin Boards.
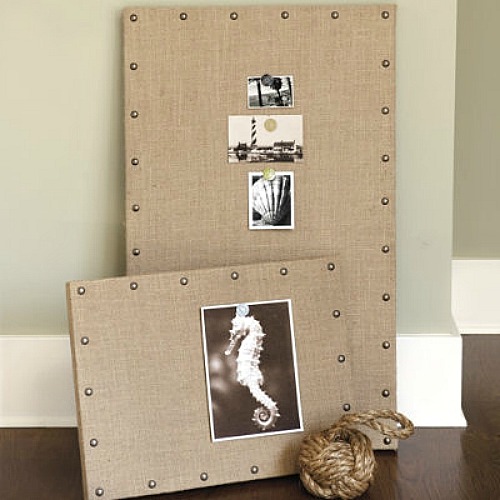
I saw these bulletin boards from Ballard and thought they would fit the space perfectly.
I already had the bulletin boards so it seemed like an easy enough project. Unfortunately, finding the supplies proved to be a little more challenging! Someone around here is having a beachy wedding and bought up all of the burlap within 30 km of my house so I enjoyed a nice tour of the local fabric stores. And really, how hard could it be to find some upholstery tacks?? I couldn’t find any in the color I wanted and had to hit up a couple of stores just to find enough of them. I ended up spray painting the tacks the same color as the letters from the DIY Art Display.
Once I finally had my supplies, the rest of the project was easy!
- Find a bulletin board. I definitely think that it is worthwhile to spend a couple of extra dollars on some decent bulletin boards. I also did a couple of bulletin boards that I bought at the dollar store for Matthew’s closet and the quality of the cork is terrible. Its okay for the closet but not for a well used bulletin board!

- Cut your burlap slightly larger than your bulletin board {I left 1.5-2 inches on each side}.
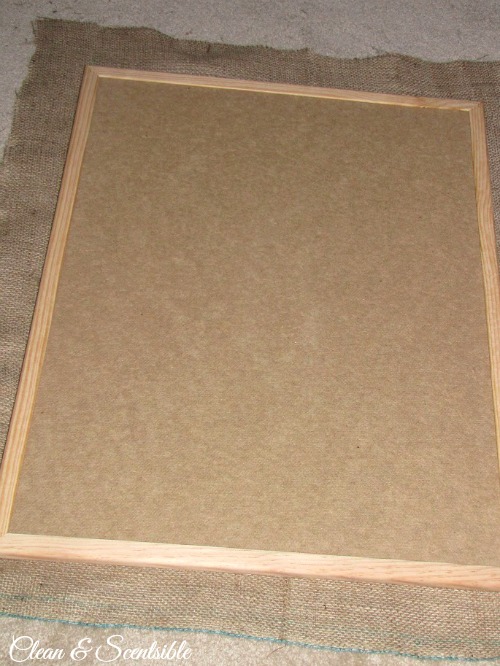
- Fold the burlap around the edges and staple with a staple gun. Try to pull with the same pressure as you staple around the board.
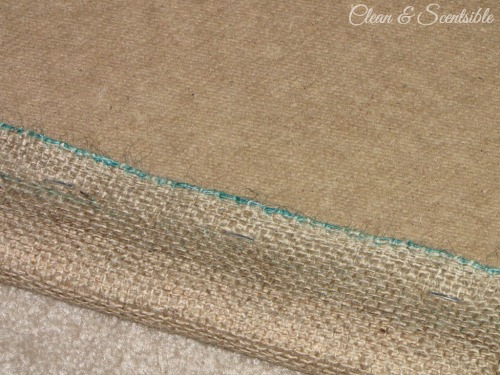
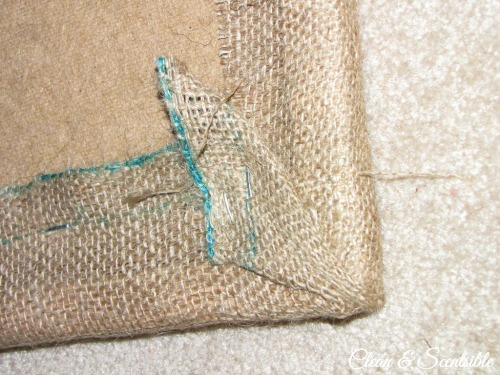
- I just folded the corners over and added a few more staples. It’s pretty forgiving – it doesn’t have to be pretty!
- I added the tacks on the inside of the molding so I didn’t have to worry about hammering them in and to help me keep them straight. I placed mine a lot closer together than the original and used just over 50 tacks for each board. For my board, the ruler was the perfect spacer to keep everything even. When I did the cheap bulletin boards for the closet, I did end up hammering the nails into the wood molding since the cork was so thin. Just cover the tacks with a towel before you hammer! 🙂 This will give you more of the look from the original Ballard design.

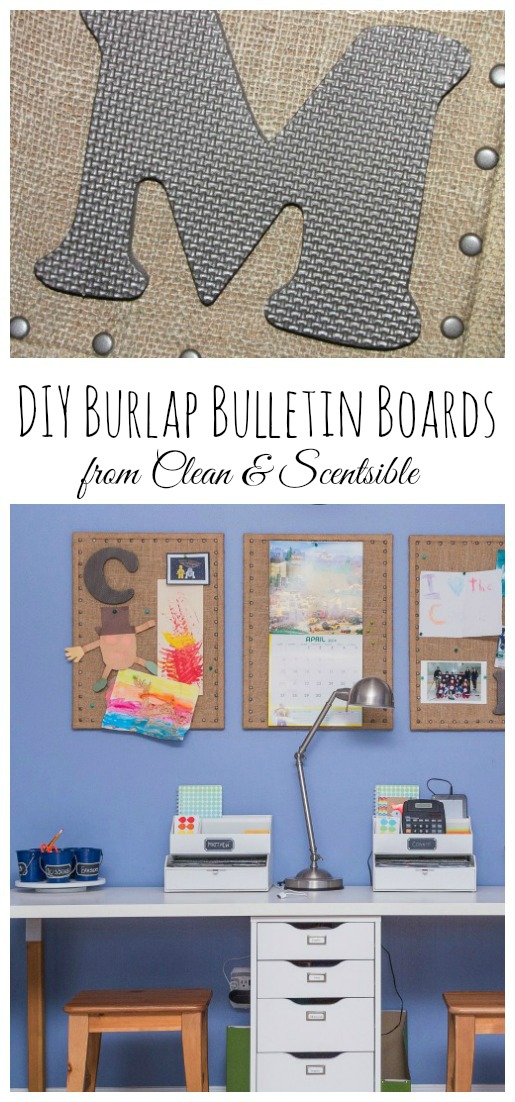
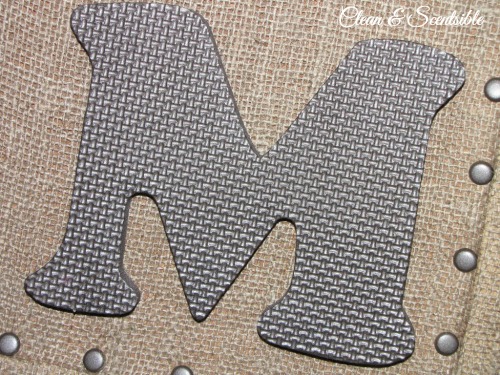
- I then spray painted two more of the foam letters from the ART wall for the kids’ initials.

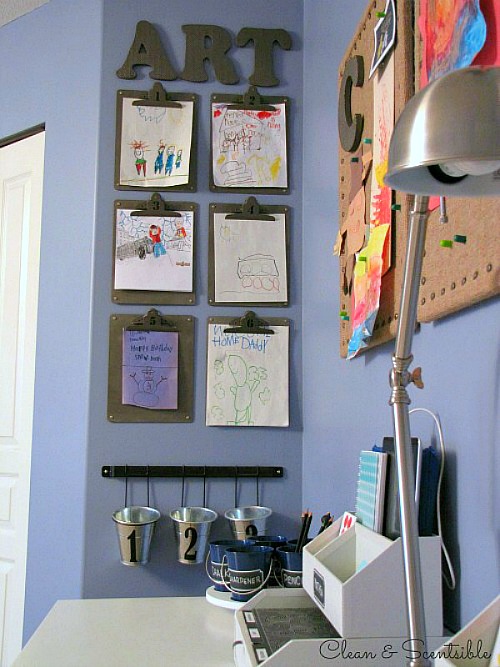
You can read more about our homework station/art station here…
YAY! Looks great! 🙂
the boards look so sweet…well done Jenn!
it looks great. I love this idea!
I love it Jenn! It looks amazing! The burlap hunt doesn’t sound so fun though! The whole art center is beautiful & functional! Have a wonderful Saturday! Angie xo
I looove burlap! I saw those bulletin boards in Ballard also. This is a great thrifty alternative 🙂
Stopping by to say hi…thanks for pinning my Aged Letter Tutorial! I love these burlap boards you just finished…I just finished one of these for my office space!!
love the burlap boards. they looks amazing!
Such a cute idea!! I’ve got a blank board laying around the house..and may just run out to find some burlap!! Great project! Thanks for sharing!!
Lovely!!! Burlap is so “in” right now!! Totally making these! Thanks for sharing!
We host a linky party “Strut Your Stuff Sunday!” We would love for you to link up! We appreciate it!!
Kristine
http://www.jandmseyecandy.blogspot.com
OK Jenn, now this is getting weird! I also made boards similar to these inspired from Ballard in my son’s bedroom! Great minds think alike!
Kim
http://kim-toomuchtimeonmyhands.blogspot.com/2011/04/vintage-airplane-bedroom-part-2.html
I love those bulletin boards. Burlap is wonderful.
Ruth
Love this! And the art wall too – I’m going to give it a try – someday… 🙂
1. What a great way to use your alphabet mat letters. I’m going to keep this in mind for when my daughter is done with hers.
2. Genius, cheap and easy way to create “brads”!!! I love it!
Thank you for sharing this at the Weekend Warrior Link Party.
Anna
http://www.askannamoseley.com
What a great idea! Looks so much nicer than plain old cork. Nice one!
Anne @ Domesblissity
Jenn, these are just darling and so easy, too! It figures you had to go on a hunt for burlap and tacks of all things–glad you were successful. I’m stopping by from SS. 🙂
Great job.
I am just reminding everyone about tonights link party that runs Friday evening through Mondays!
I also have an ongoing give away link party now too.
Hope to see you soon.
http://bacontimewiththehungryhypo.blogspot.com/
come strut your stuff
Hi, you did a great job. I pinned it on pinterest, you can find it here
http://pinterest.com/charityj/fab-ideas-i-love/
Have a great weekend,
Cha Cha
How neat! My grandkids could really use an area like this in my house. Right now all their art and coloring supply items are in one of the draws in the hallway.
I am so impressed with women who can just see something and copy it. Really cute idea!
This is a great project… it would even work in the kitchen where I am trying to leave notes and reminders during the school year for what needs to be turned in when! Thanks a bunch for the tutorial! I’ve linked over from the WhipperBerry Friday Flair where I’ve linked up too, I’d love it if you’d pop on over.
Hugs, antonella 🙂
http://quilling.blogspot.com/2011/06/wondrous-wednesday-patriotic-printable.html
How cool!!
These are great! I’m decorating a room with burlap accents and these bulletin boards would be perfect. I even have the bulletin boards already and needed to do something like them {since my little men thought they could color on the cork!} Saw your project featured on Whipperberry this morning… my 4th of July burlap wreath is featured there too. Yippee!!
xo,
Laurie @ Gallamore West
The burlap boards are so adorable. You have given me so much inspiration for our homework zone! Thank you so much for sharing!
Nice job on the organization!