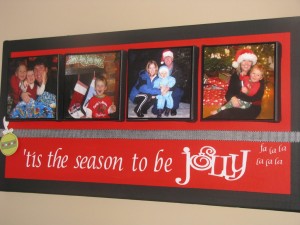
Hello all! Hope the Christmas preparations are going well! I still have not even wrapped one present but do have a couple of days off work before Christmas to {hopefully!} get everything done. I have been having a great time creating some fun canvas projects over the past couple of weeks. Most are for Christmas presents so I will have to wait until after Christmas to post those. But, I do have a Christmas canvas that I can show you.
I was in a hurry getting things done so I didn’t take a whole lot of pictures but here is a brief tutorial for those that are interested.
MATERIALS
- 1 12×24 canvas {bought from Michaels with a coupon}
- 4 5×5 canvases {I picked a bunch of these up at our local discount store along with some 12×12 ones}
- paint
- ribbon
- Quick Grip glue
- flocked vinyl
- painter’s tape
- 4 5×5 pictures. I get most of my pictures done at Scrapbook Pictures. You can easily crop your photos and choose a variety of borders. I like the black borders for these canvas projects to give the edges a nice clean look.
- paper trimmer
- double sided tape
HOW TO
- Paint the front of your 12×24 canvas. Red is always a pain to paint with so this took me 3-4 coats. If you are using a lighter colour it will only take 1-2 coats.
- Using painter’s tape, mark off a border around your canvas. I usually like my border a little thinner than this one {usually around 1/2 an inch} but due to a little paint incident, I had to make this one a little thicker!
- Paint the border and the outer edges of the canvas black.
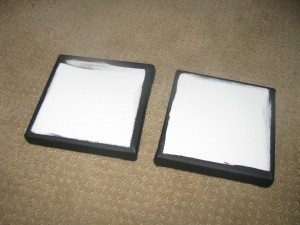
- Paint the outer edges {and a small portion of the front} of the 5×5 canvases.
- Glue on your photos with the Quick Grip {you don’t need a lot}. Your photos may have to be trimmed a bit as the canvases usually aren’t a perfect 5×5.
- Glue the 5×5 blocks to the larger canvas.
- Add ribbon with double sided tape. {I also added a chipboard ornament to mine with pop dots}
- Add the vinyl. I printed mine off on my Silhouette and the “Jolly” was downloaded from the Silhouette site. You can also use stickers or stencil onto the canvas.
And there you have it. I love the dimensional aspect of the canvas blocks on the larger canvas. I’m sure everyone is done with their Christmas crafting by now, but these canvases are great for family pictures, grandparents gifts, wedding presents, baby photos, etc.
Hope everyone has a good rest of the week!
I have linked up with Today’s Creative Blog, Paisley Passions, I Heart Naptime, Night Owl Crafting, The DIY Showoff, Childmade, Blue Cricket Design, House of Hepworths, Chic on a Shoestring, It’s Fun to Craft, Yesterday is Tuesday, Funky Junk Interiors, Sugar Bee Craft Edition and Tip Junkie.


so cute, love it! where do you buy flocked vinyl?
Jamie – I just got it at one of my local scrapbook stores (Photo Express). It was just in with the other QuikCutz (not sure if that is how you spell it!) vinyl. Hope that helps!
Very nice! I’ll have to keep this in mind for next year’s gift giving!
And thanks for the tip on where to buy the vinyl!
What a cute idea! Glad you shared it.
Love this!!! Thanks for sharing how you made it too.
thanks for the guide I may try to make my own
I LOVE this idea. What a great grandparents gift.
How do you get the flocked vinyl onto the canvas. Do you just print directly onto the vinyl from your average printer? Or is there an expensive printer I need to purchase. Also, if you can’t print from a regular printer, could you recommend an alternative way to get the lettering on?
Thanks. I absolutely LOVE the design!!
The vinyl and flocked vinyl were both cut out using a Silhouette machine. The vinyl just sticks to the canvas and the flocked vinyl needs to be ironed on. If you don’t have a silhouette machine, you can always use stencils or even stickers to add the wording.