Learn how to organize the garage with these DIY garage organization tips and tricks. Take back your space and create the clean and functional garage that you’ve always wanted!
How to Organize the Garage {DIY}
If you’re ready to get your garage cleaned and organized follow this step by step plan. It may take a little work, but it will be well worth it in the end!
Get Inspired
Organizing our garage has been on my official to-do list for over two years now and, in reality, it has been in need of a good re-organizing for much, much longer than that. The garage has always been our dumping ground, and we have not even thought of actually parking our car in there for years. The messier it got, the more over whelming it became to try and organize.
Well, this year, The Household Organization Diet moved into the garage and I was determined to get the space cleaned and organized! I partnered with BEHR Paint and, thankfully, they provided me with the extra motivation I needed to get things done! You can find my to-do list and all of my garage organization inspiration ideas HERE.
Set aside a time
If you really want to organize your garage, you’ll need to make it a priority and set aside a good chunk of time to get things done. The more family members that help out, the better, so try to get everyone involved. From experience, I always double the time I expect organization projects to take. It’s definitely better to have too much time than not enough!
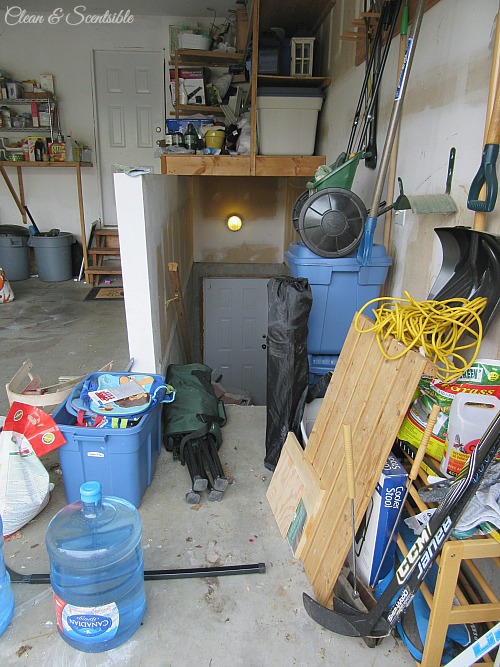
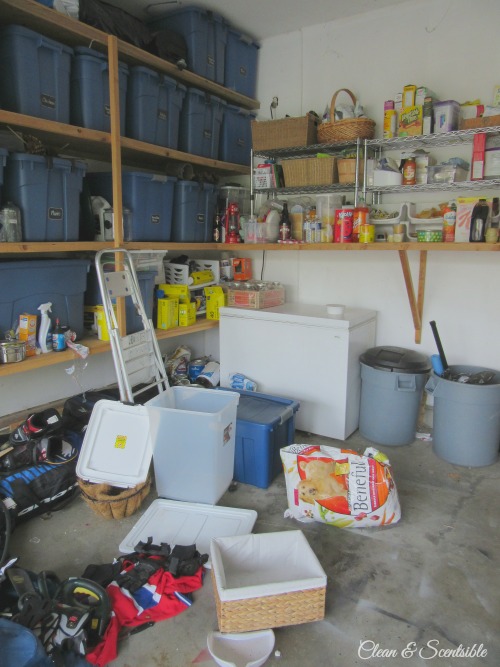
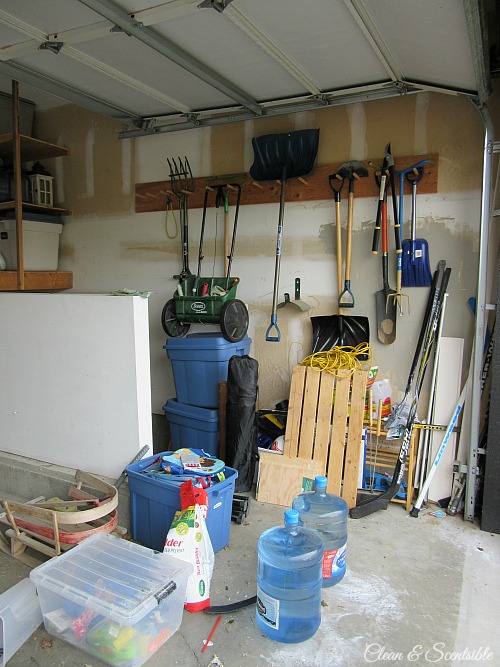
Our garage was in rough shape, so it took us a couple of weekends to finish things up. It was a lot of work, but we now have a pretty and {most importantly!} organized garage space! To give you an idea of what we were starting with, here are a few before photos for you…
The saddest part about all of these photos, is that we had actually already hauled a ton of stuff out onto the driveway. This was only about half of it. No judging please. I told you it wasn’t pretty! 😉
Empty Everything Out
Ideally, you want to empty everything out of the garage so you can really have a good look at what you have and how you want to organize everything. If you have a ton of stuff in your garage, however, you may need to work in sections. Since we were also painting our garage, we could only work on specific areas at a time and divided the sections up from lowest to highest, starting with the floors first. {NOTE: Due to timing issues we had to paint the floors before doing the walls. If we did it again, I would definitely try to do the walls first}
Sort Into Categories
The first thing that we did was move everything off of the floor areas. As we worked, we sorted into four piles – things to throw out {which went immediately to the dump}, things to donate {which we also tried to take down to the second hand store as we went}, things that belonged elsewhere in the house, and things that were to remain in the garage. For those items that we were keeping, we further sorted them depending on their function and use. For example, all of the sports stuff went into one pile, yard equipment went into another, etc.
Paint
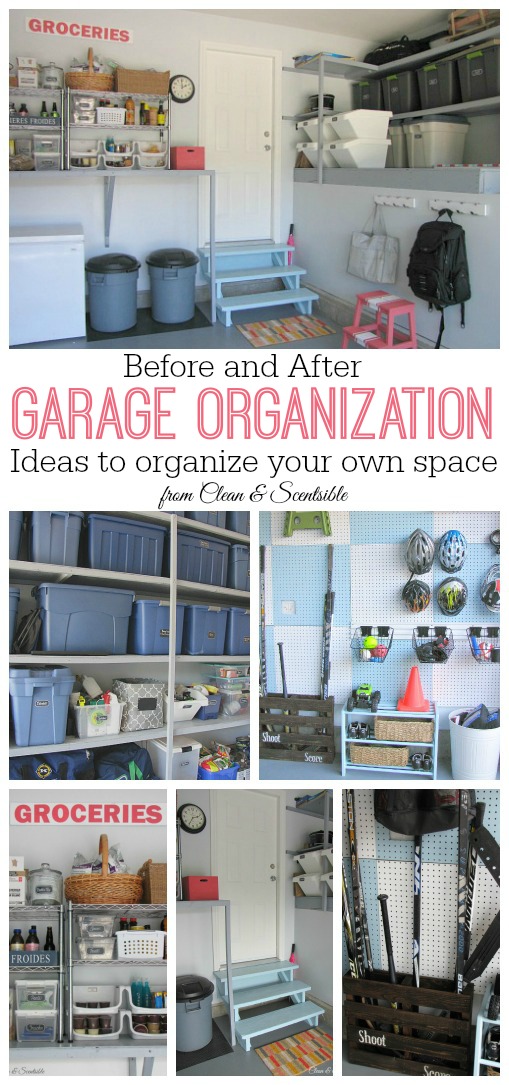
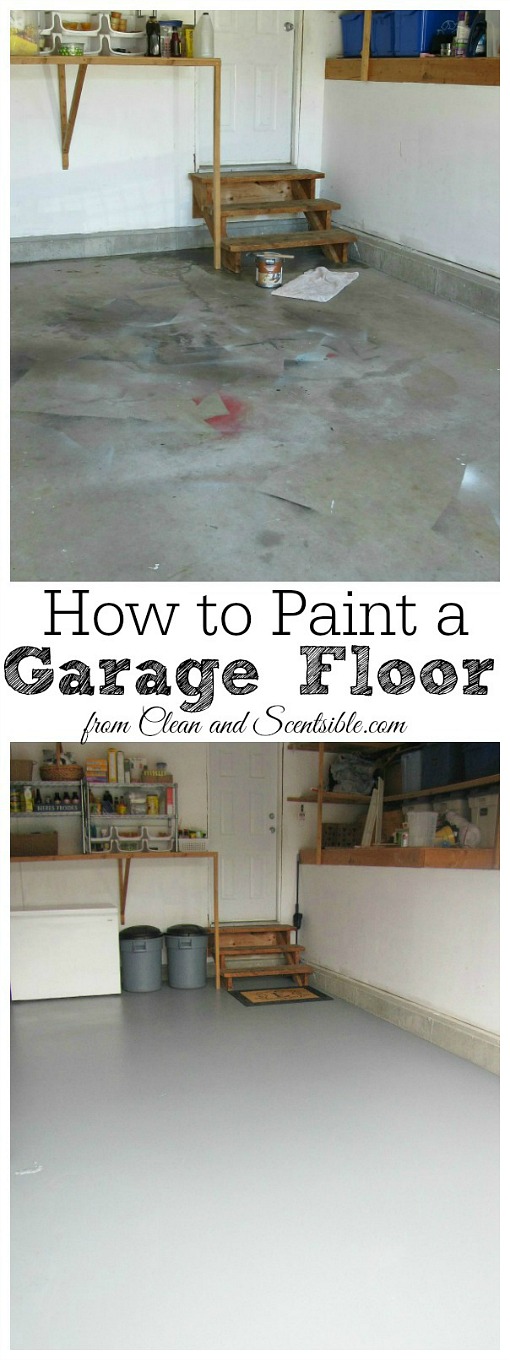
The painting part of this project took us the longest and can definitely be skipped if you’re short on time. It also, however, made the biggest difference in the look of the garage and brightened it up so much more! For us, we started with the floor {which definitely needed a facelift!}. To paint the floors we used Behr Concrete and Masonry Bonding Primer and Behr Premium1-Part Epoxy Concrete and Garage Floor Paint in Slate Gray. The whole process was surprisingly easy and made SUCH a difference! You can read more about how we painted our garage floor HERE.
Next, we painted the back wall and the right side of the garage. We used Behr Marquee Paint in River Veil for the walls and Behr Marquee Paint in Rainmaster for the shelving units. I am always amazed at what a difference a fresh coat of paint can make- the garage just looked so much brighter and cleaner. This was actually my first time using the Behr Marquee line and I absolutely loved it. It’s a primer and painter in one and the whole garage only required ONE coat – even those bare shelving units! As someone who does not enjoy the process of painting, this was a huge bonus!
I had originally wanted to paint the door a fun color, but since it opens up onto our laundry room, I decided to keep it white and paint the stairs instead. The stairs got painted in Behr Marquee Balboa.
Add Some Function and Details
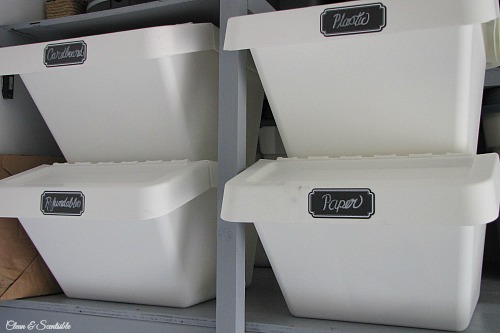
I picked up some new recycling bins from Ikea and used some Martha Stewart chalkboard labels to keep everything organized. I love how these can stack and I don’t have to see inside them! They are about the perfect size for a week of recycling.
Another project that made a big difference but did not take a lot of time, was trimming out the door. Those little touches always help and it is so nice to enter our house through a finished door!
We have quite a small pantry in our kitchen so I keep some of our extra pantry items and bulk items out in the garage. I’ll write more about this in another post but here is a little peek for you…
Organize the Garage by Zones
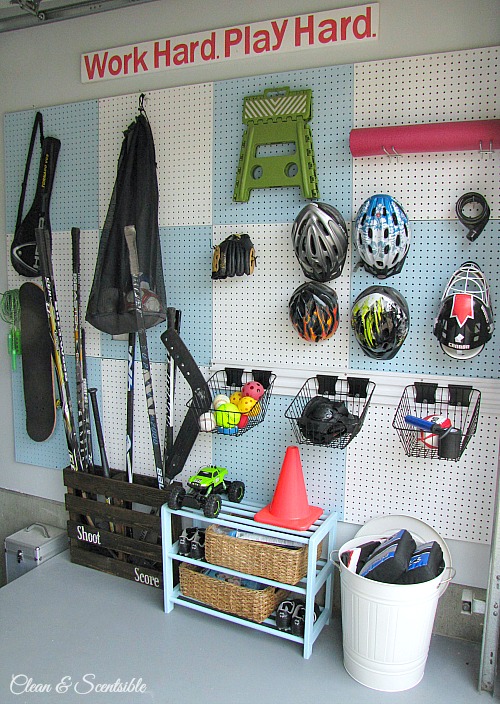
When we planned out our garage organization, we organized everything into zones so each type of equipment or item gets a specific section of the wall or floor space. On the right wall closest to the garage door, we have all of our sports equipment. I wanted everything to be easily accessible to the kids so that they would be able to get {and put away!} their own stuff as much as possible and this pegboard organization system has been working out great! {You can read more about how to build a pegboard wall HERE}
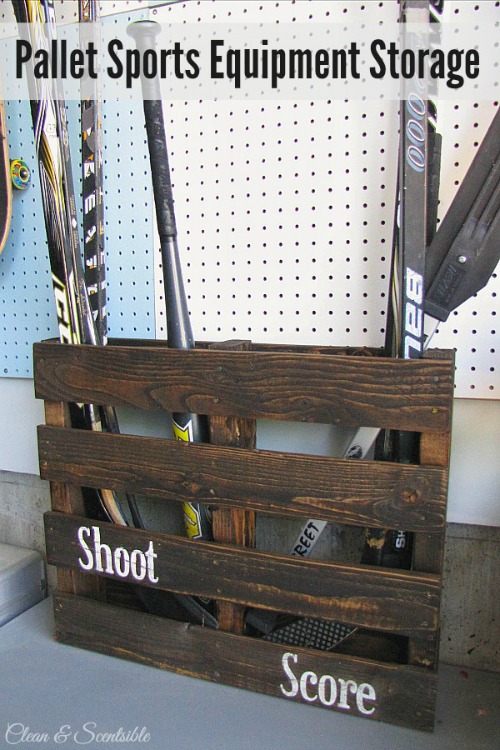
I also made a pallet sports organizer from an old pallet that I had to hold our hockey sticks and baseball bats.
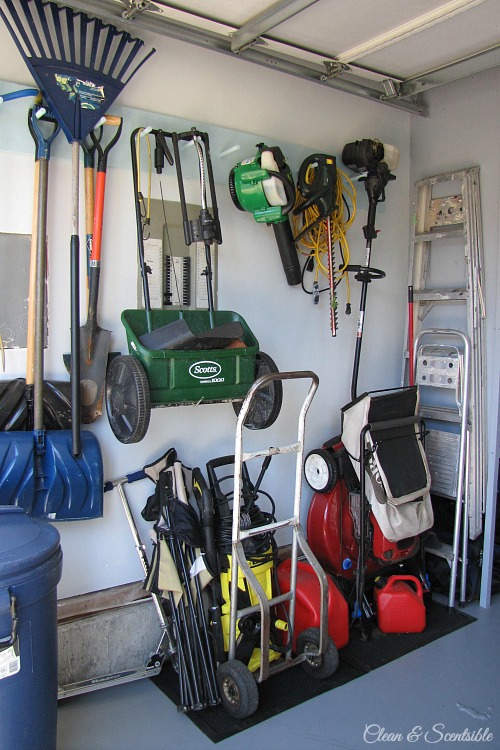
Since most of our yard and garden equipment was previously on this wall, we had to move all of that over to the other side of the garage.
I painted the wall hooks in the Balboa and hung most of our equipment up on the pegs. I purchased an inexpensive rubber mat for all of the other items that needed to be stored on the floor. The step ladders were hung on hooks on the side of our storage unit.
Use Garage Shelving to Optimize Vertical Space
We had these wooden shelving units built about seven years ago when we finished our basement {to hold all of our stuff that was previously down there!}. We had always meant to paint them but just never got around to it. The top three shelves {with all of the blue bins} are all of our Christmas decor items {yes, I realize that I am a tad obsessed with Christmas!} so we only need to access these once per year. The bottom shelf and the floor hold our items that we used more regularly – camping gear, hockey bags, car care, etc. The storage cases are a little bit random, but we used what we had, and everything now has its own place.
Celebrate your Accomplishment
This was definitely not a quick or easy project to do; however, now that it is done, I am SO glad that we did it! Everything is now organized and pretty and it really makes me put in that little bit of extra effort to help keep it that way.
Now it’s time for you to get started on your own garage organization project. If you’re having trouble overcoming your decluttering paralysis check out this post for how to get declutter! You can do it!!
This post is part of my DIY Behr Expert Painting series. Look for a new painting project each month!






WOW! Amazing! I wish I could have a garage like that. Curious about your lawn mower… is it folded up?
Yes, it folds up and it is SO much better for space!
I enjoyed your garage makeover post. Thank for your thourgh descriptions. Do you make your own signs? I’m interested in the grocery sign and your laundry sign. Please tell me how you make your signs or where you buy them.
Yes, I do make the signs. I just paint the boards and use my Silhouette to make a stencil for the letters and then paint those in. If you don’t have a Silhouette you can try looking for regular stencils in the size you want {office supply stores typically have a few styles and sizes}. You could also try this wax paper transfer technique to get the outline and then paint it in…
https://www.cleanandscentsible.com/2012/06/i-cant-believe-it-is-monday-this.html
Hope that helps!
Awesome job, Jenn! Looks seriously aaaamazing. Those floors really make the space- can’t wait to paint mine now! XOXO
I like the idea of painting the floor as the starting point of organizing a garage. It gives you a good reason to remove the stuff and start from a scratch. Using a pallet for storing the sports equipment is a brilliant idea!
Yes – it is so much easier to organize {and get rid of!} stuff when you physically take it all out rather than just trying to move it around!
How long did this process take?
We did it over a couple of weekends. 😉
I have never ever left a comment on ANYTHING in my life, but I had to tell you that this is so awesome, and really straight forward. I think it’s fabulous. I am so inspired, I will be starting my own this weekend, and have already contacted my paint buddy!
Thanks for this!
I’m glad you found it helpful! Good luck with your project and lucky you for finding a paint buddy! 😉
What an amazing way to freshen up a space that we often dread looking at. I feel this is a great project for those looking to sell their homes as well. It looks crisp and clean, just lovely. Thanks for sharing!
I have block walls in Garage. What can I do to hang things on the walls
Sorry it has taken me so long to reply! I don’t have block walls so I can’t say from experience. I know that you can drill into them and that there are specific anchors that you can use. Once they are up you can hang whatever you would like and could do something similar to the pegboard wall or just have plain hooks if you would like. I would just head down to your local home supply store like Home Depot and ask an associate for assistance. I don’t want to give you the wrong advice! 😉
Hello! Where did you find the Shake style peg rack that you hang your lawn equipment on? Did you make it? Wonderful job – very inspiring!
Yes, we made that – but probably about 15 years ago! So long before my blogging days. 🙂
Beautiful!!! Did you take down the shelving units to paint them and paint the walls around them or did you leave them up and paint them as is?
It would have definitely been easier if we had painted before installing them, but they’re pretty much built in so we just painted them and the walls in place. 🙂
Where did you get the peg board to hang all the lawn equipment on?
It’s just a DIY. Just some 2×4 board and dowels. 😉