Hello all! I hope your week is going well. The weather has turned cool and rainy here. It is definitely feeling like fall! October will soon be upon us so let the Halloween countdown begin!
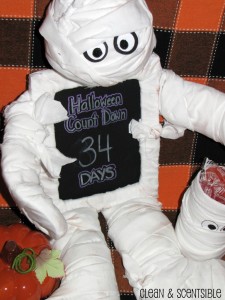
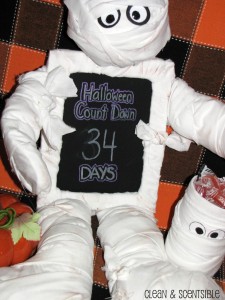
I always love holiday countdowns – they just seem to increase the excitement! {plus I don’t have to listen to my kids asking “How much longer?” every day} While waiting in the grocery store line up, the kids spotted a Mummy countdown in one of the magazines {sorry I can’t remember which one} and our Mummy countdown was born!
The mummy in the magazine was flat but I wanted ours to be able to sit up. He is much happier when he can sit up and look around. He also has a posable head and arms. And since we didn’t want him to be lonely, we created a little “Mummy Sidekick” to hold a treat for the kids each day.
MATERIALS
- approximately 1 yard of Muslin
- brown ink
- wooden 5×7 picture frame and chalkboard spray paint {I purchased mine at the dollar store}
- wire and wire cutters
- stuffing
- cardboard {the thicker the better}
- styrofoam ball {mine was probably a 4-5 inch diameter ball}
- glue gun
- tin or jar for the Mummy Sidekick
- black and white paper for eyes
- glitter for eyes {optional}
TO DO
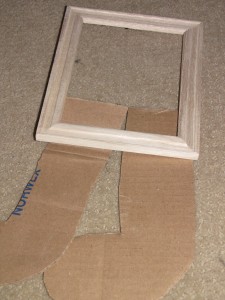
- Spray paint the wood insert on your picture frame with chalkboard spray paint. I did 3 coats on mine. Follow the instructions on the can for dry time and chalk board prepping.
- Cut out cardboard shapes for the arms and legs. You want to have approximately 3 inches of cardboard extra at the end of the arms and legs to fold over and attach to the picture frame. I folded the cardboard straight across for the legs. For the arms, I folded the cardboard at roughly a 45 degrees angle so the arms would slightly angle downwards rather than stick straight out.
- Rip your muslin into strips 2-3 inches wide. Just tie the strips together if you need longer pieces.
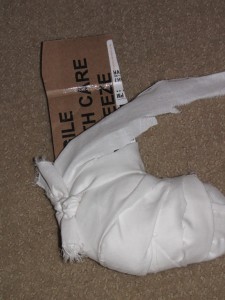
- I started with my legs when assembling the pieces. Starting at the foot, begin wrapping the Muslin around your cardboard shape. Fill with stuffing as you go. Continue all the way up the leg until you reach the folded part.
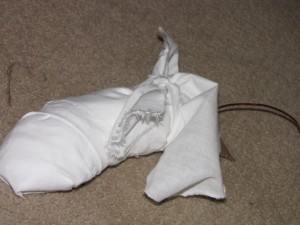
- For the arms, cut some wire approximately 4 inches longer than the cardboard arm. Begin wrapping the arm with the muslin as you did with the legs. Once you have it started a bit, insert the wire in so the arms will be posable and hold their shape better.
- Insert a wire into the bottom of the Styrofoam ball so that you will be able to attach it to the frame {I left about 5-6 inches of wire sticking out of the bottom}. Wrap your Styrofoam ball with the muslin for the head. If some of the muslin is sticking up a bit, just fold it over and add a little hot glue to hold it.
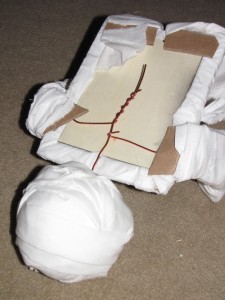
- With the insert of the frame removed, wrap the Muslin around the picture frame. Make sure that you just have a thin layer on the inside of the frame so the insert will still fit back in. Put the chalk insert back into the frame once you are done and secure. Mine was a really tight fit so I did not need to worry about gluing or using the little tabs to secure it.
- Now assemble your extremities using hot glue to secure the arms and legs. I then wired the arms together and wired the head on.
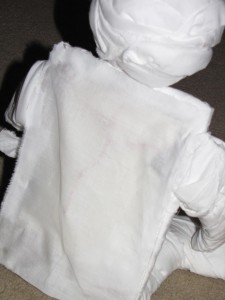
- Not that you really see much from the back, but I did cut a piece of Muslin to fit over his back to tidy up the wires and cardboard pieces.
- Using some brown ink, mess up your Mummy a bit.
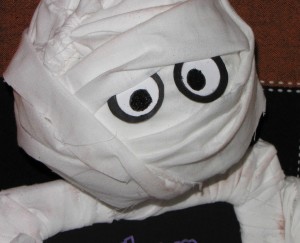
- Cut out two black circles, and four slightly smaller white circles for the eyes. {You will need two sets of eyes. For the Mummy Sidekick, I did not have the larger black circles}. Using a sharpie, I drew a smaller black circle in the white circle. I then added some glue where I drew the black circle and added glitter. It’s kind of hard to see in the picture but it just adds some sparkle to his eyes!
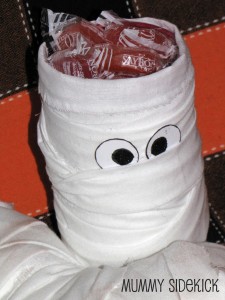
- For the Mummy Sidekick, take a jar or tin and wrap it with the left over Muslin. Stick in the eyes, pick some candy and you are done!
I have one candy for each day. Hopefully the added candy will help the kids to remember to change the countdown each day!
The tutorial seems a little long but it actually goes together fairly quickly. Now I just need to find a spot for him!
Don’t forget to pop back this evening to link up your ideas to the fall/Halloween edition of The Creative Spark. I’ll be doing lots of extra features on my facebook page over the next two weeks of my Ghostly Gathering. The Stella and Dot jewelry giveaway is also still going on. Entries are low so you have a great chance at winning $40 to spend on anything you would like! And lastly, if you enjoy this blog and have a chance, I would love it if you could vote for me over at The Circle of Mom’s Top 25 Home Management Blogs. I really do appreciate all of your support!!!
See you tonight!
I linked up with Itsy Bitsy Paper, The Letter 4, The CSI Project, Eighteen25, Young and Crafty, Freckled Laundry, Midwestern Sewing Girl, Centsational Girl, My Uncommon Slice of Suburbia, Tip Junkie, Thrifty Decor Chick, Home Stories A to Z, Skip To My Lou, Craft-O-Maniac, The DIY Showoff, Come Together Kids, Under the Table and Dreaming, I Heart Naptime, Be Different Act Normal, Funky Junk Interiors, Tatertots and Jello, Whipperberry, Just a Girl, Design Dazzle, Chic on a Shoestring, Thirty Handmade Days, The Crafty Nest, Sun Scholars, Fingerprints on the Fridge, Tidy Mom, The CSI Project, Delightful Order, The Shabby Creek Cottage, Somewhat Simple, Lil Luna, Night Owl Crafting, Blue Cricket Design and Today’s Creative Blog.

awe how cute Jenn! the boys must think that is so cool!
Very cute! 🙂
Oh this is very creative! Nice job! Stopping by from Night Owl Crafting link party.
This is very cute and creative! Thanks for sharing your tutorial.
Love! I’d be thrilled if you’d link up to my Wickedly Creative Halloween Ideas Party.
http://www.itsybitsypaperblog.com/2011/09/wickedly-creative-halloween-ideas-linky.html
What a cute idea! Thanks for sharing 🙂
http://kimberscraftday.blogspot.com/
You’re very welcome to link up this one to my new linky party here – http://ivanna.blog.com/linkparty01/ . It has already started. Make yourself at home :).
He’s adorable! I may have to try this.
Very cute!! I kinda have a thing for mummies. Ha! I would be very honored if you would link this up to my Commercial Break Thursday!
suzy
This is such a fantastic idea, Jenn! My kids LOVE counting down to anything…especially when the end of the countdown involves candy…;)
I would love if you would link this up to my Everything Halloween party starting this Sunday!
http://midwesternsewinggirl.blogspot.com/2011/09/everything-halloween-preview.html
Thanks so much!
This is great, Love it! Come link up to scrappy saturdays over at candacecreations.blogspot.com I’d love to see you there!
Candace
This countdown mummy doll is adorable. I would love for you to join my weekly linky party and share, fri-mon.
http://bacontimewiththehungryhypo.blogspot.com/
Come strut your stuff.
This is a great way to build the excitement for Halloween. I love it! I’d love for you to come share this at my Halloween link party at http://igottacreate.blogspot.com Please come share. <3
I love this! I’d love for you to join my brand new linky party! http://www.coffeeandtheirkisses.com/2011/10/stitch-n-niche-saturdays-linky-party-1.html
I LOVE LOVE THIS.. What a great festive idea… I would LOVE for you to link and share at my blog party – Fall Crawl happening now pweease.. I love this.. Officially following ya with smiles.. Great blog.Love all the inspirations.. 🙂 Excited to wander off and read more.. I’m Marilyn via http://theartsygirlconnection.blogspot.com/2011/09/fall-crawl-day-12-blog-party.html
This is too cute. I want more than one.
Aww… he is super cute!
Such a easy project to turn out so amazing!
Thanks fo sharing it!
This is so adorable. I love how you put it together, very creative use of the frame.
Jenn, This is awesome. Love it. I’ll be featuring it tonight. 🙂 Thank you for linking with air your laundry Friday!
Your Mummy is great. Too cute.
Absolutely adorable! It turned out great and I bet the kids love it:@)
Congrats on getting to share this on HGTV! How cool is that?
If you can countdown to Christmas, why not Halloween!? That is just way too cute.